

Overview
The Cal.com action lets your AI agent read live availability from one of your Cal.com events and book meetings during the conversation. The AI agent shows the open slots, the customer picks one, and the booking lands on your Cal.com calendar.Best for:
Booking demos, consultations, and support calls without sending the customer off to a separate scheduling page.
- “I’d like to book a call”
- “What times are you free this week?”
- “Can I schedule a demo for Thursday?”
No integration required. Cal.com works from your event URL alone, so you don’t need to connect anything under Integrations. If you use Calendly instead, that one does require an integration.
How to create the action
1
Navigate to Actions
Go to your Chatbase dashboard and select your AI agent. Click Build > Actions in the left sidebar.
2
Create the Action
Click Create action, then select Calcom Get Slots.
3
Configure General Settings
Action Name: Give the action a descriptive name. The AI agent uses this name to help decide when the action applies, so make it specific.When to use: Describe when the action should be triggered and the kind of customer queries that should trigger it. See Examples below.To restrict the action to procedure steps only, turn on Only use in procedures. When it’s on, the When to use field is hidden, because the AI agent no longer decides when to call the action.
4
Add your Cal.com Event URL
Enter your event URL in the Cal.com Event URL field. This tells the action which event to make bookings into.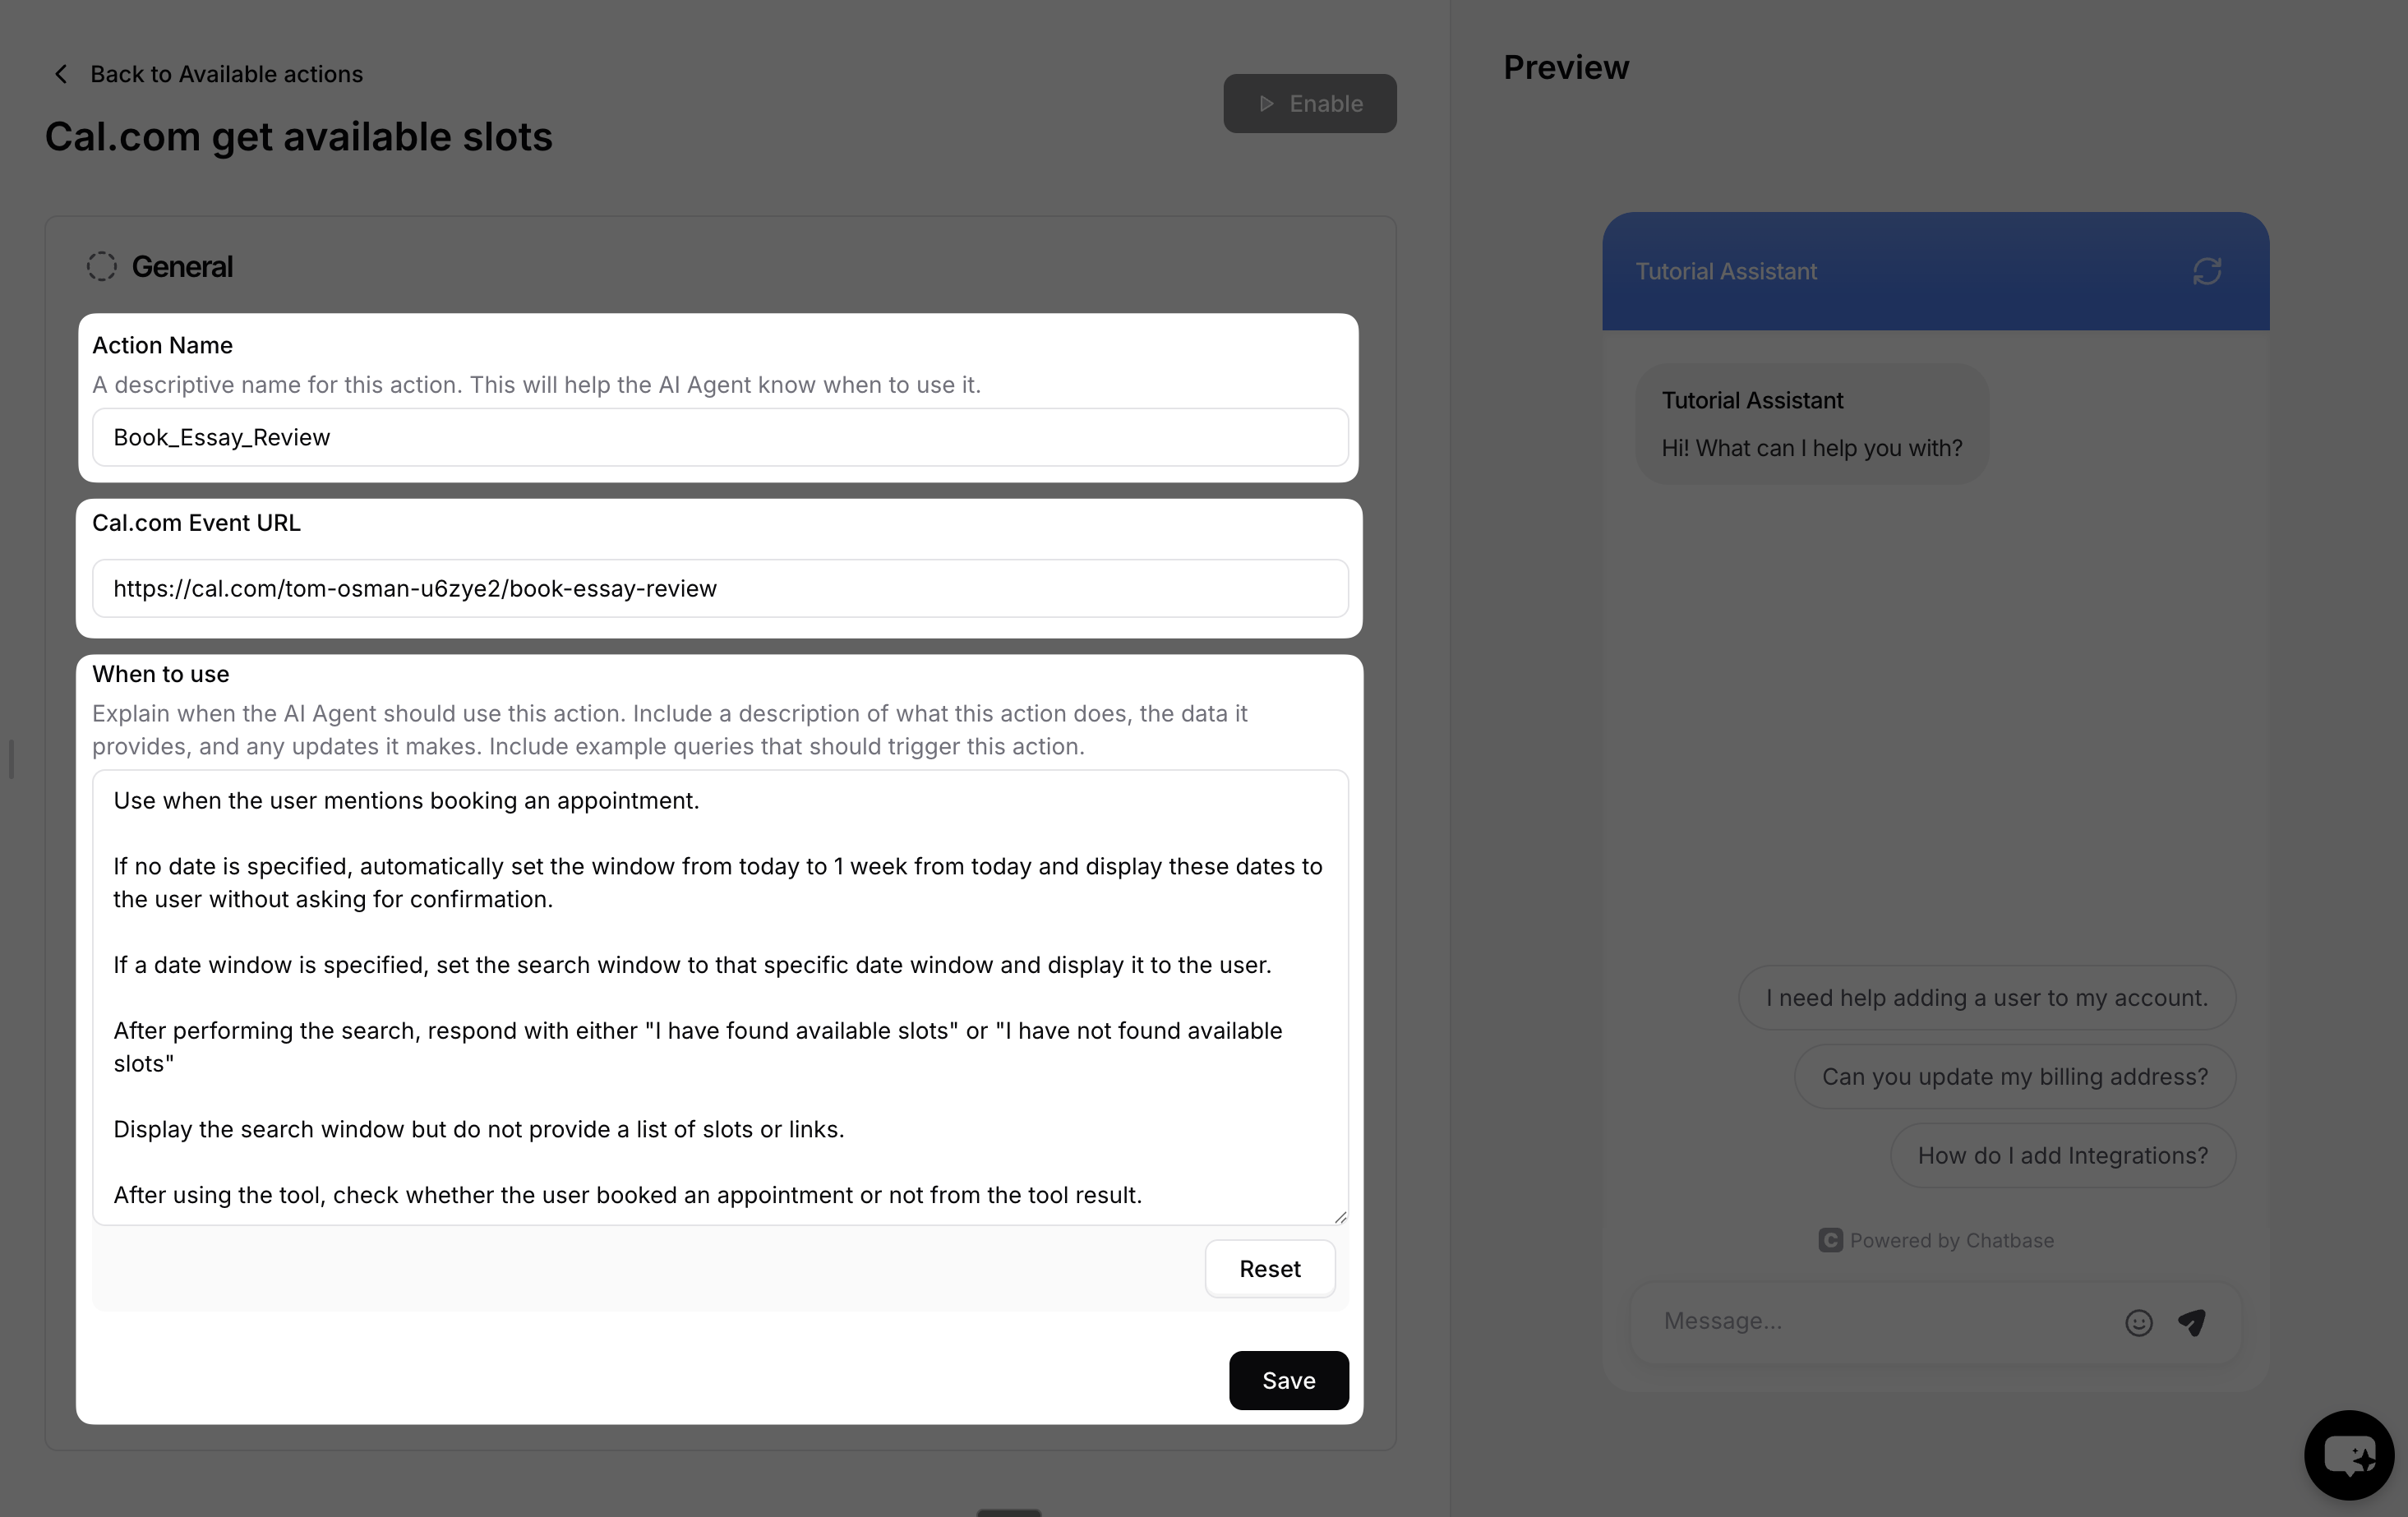
5
Choose Channels
This action is compatible with the Chat bubble, Help page, and Center Stage channels only. Every other channel is incompatible and can’t be selected. Toggle it on or off for each configured channel, then click Save. See Channels for what configured, unconfigured, and incompatible mean.
6
Enable and Test
Ensure the action is toggled to Enabled, then test it.
Settings
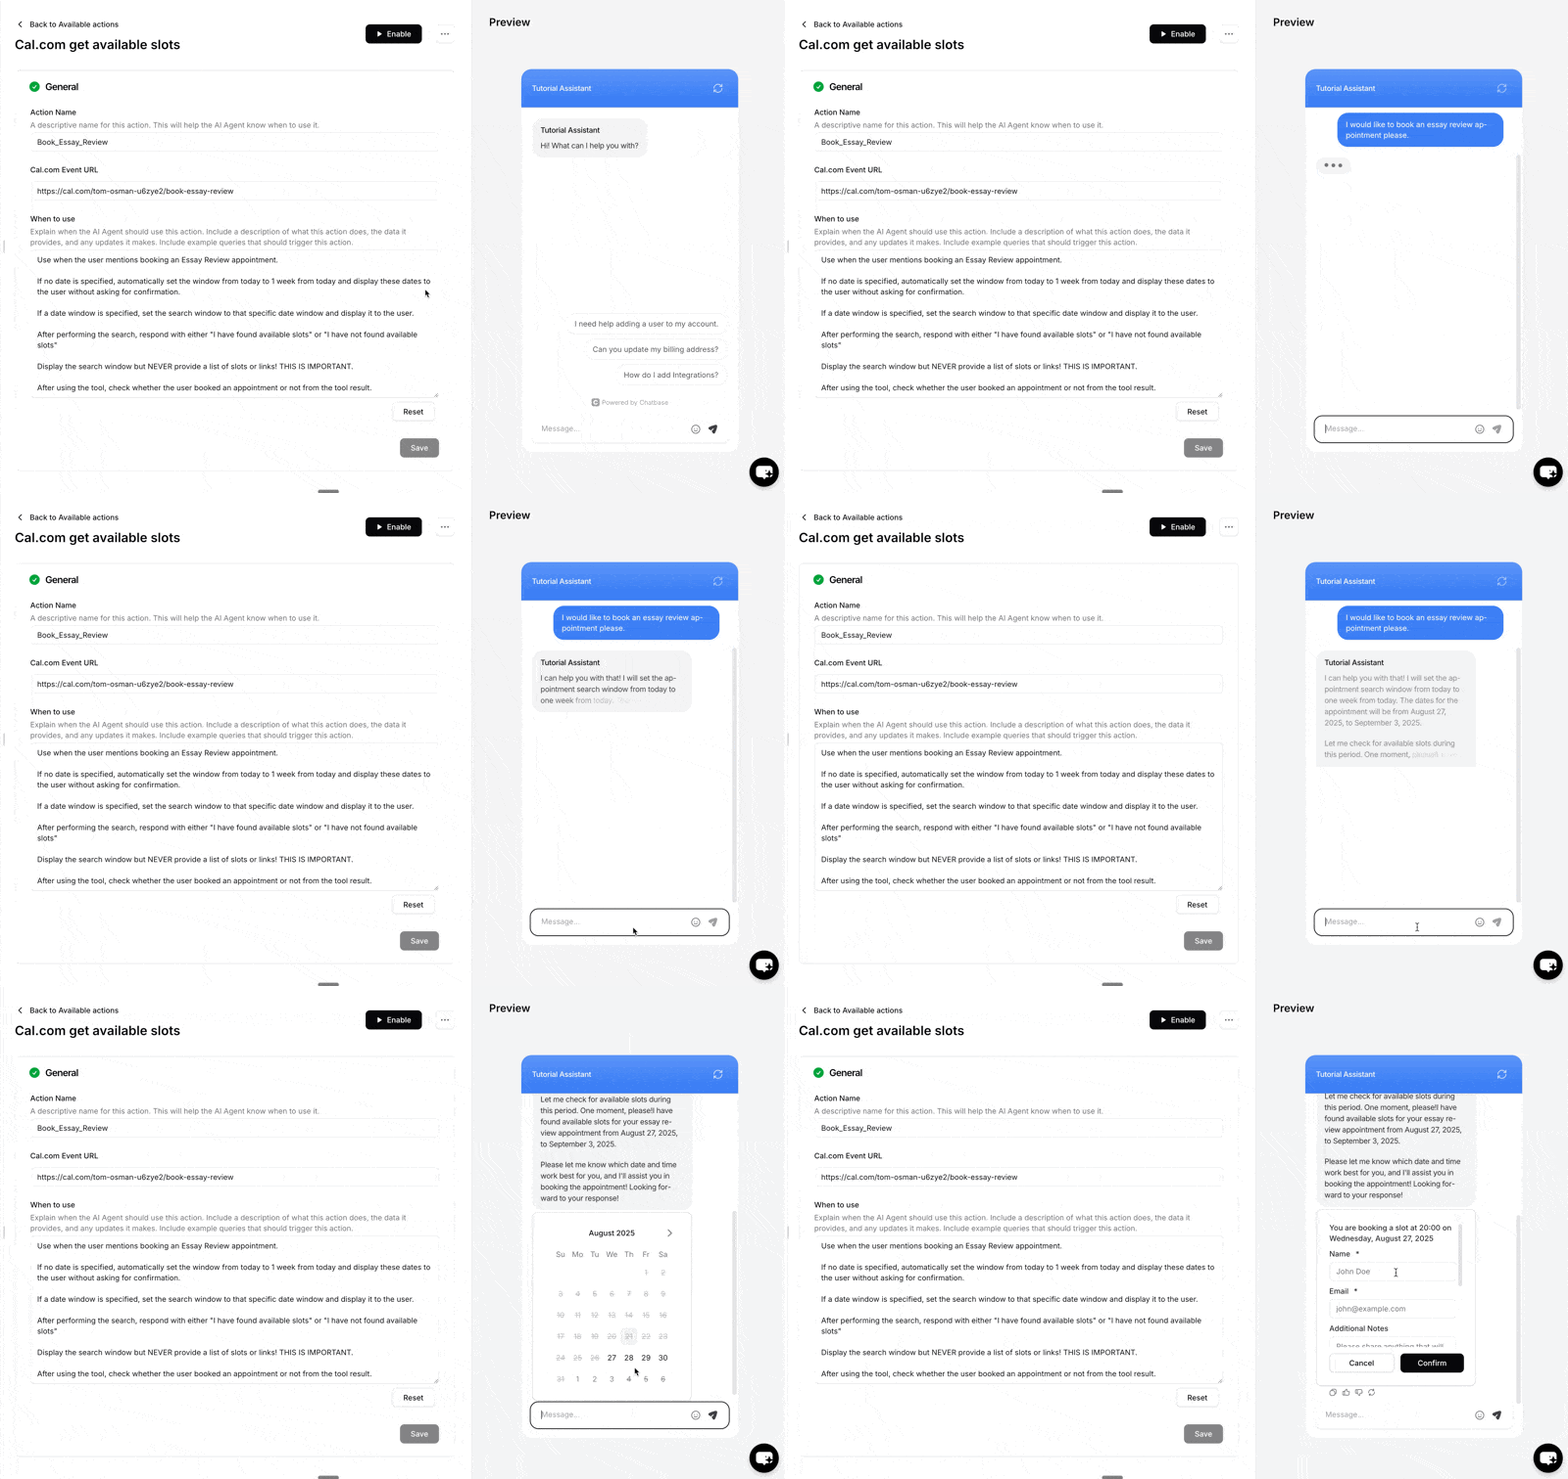
Time format: You can display Cal.com meeting times in a 12-hour format (AM/PM) instead of the default 24-hour format.Test the action by asking your AI agent to book an appointment, and confirm the booking appears on your Cal.com calendar.
Examples
Use these as starting points for the When to use field:Best Practices
Clear Action Triggers
Write a specific When to use description so the AI agent knows exactly which requests should open the booking flow. Include example phrases customers actually type.
Use a Descriptive Name
The action name helps the AI agent understand what the action does. Name it for the meeting type, such as
Book_Demo or Book_Support_Call.Confirm the Outcome
Instruct the AI agent to check the tool result and tell the customer whether the booking went through, rather than assuming it did.
Test Thoroughly
Test the action with several phrasings before going live, and verify each booking lands on the right Cal.com event.