

Anatomy of a field
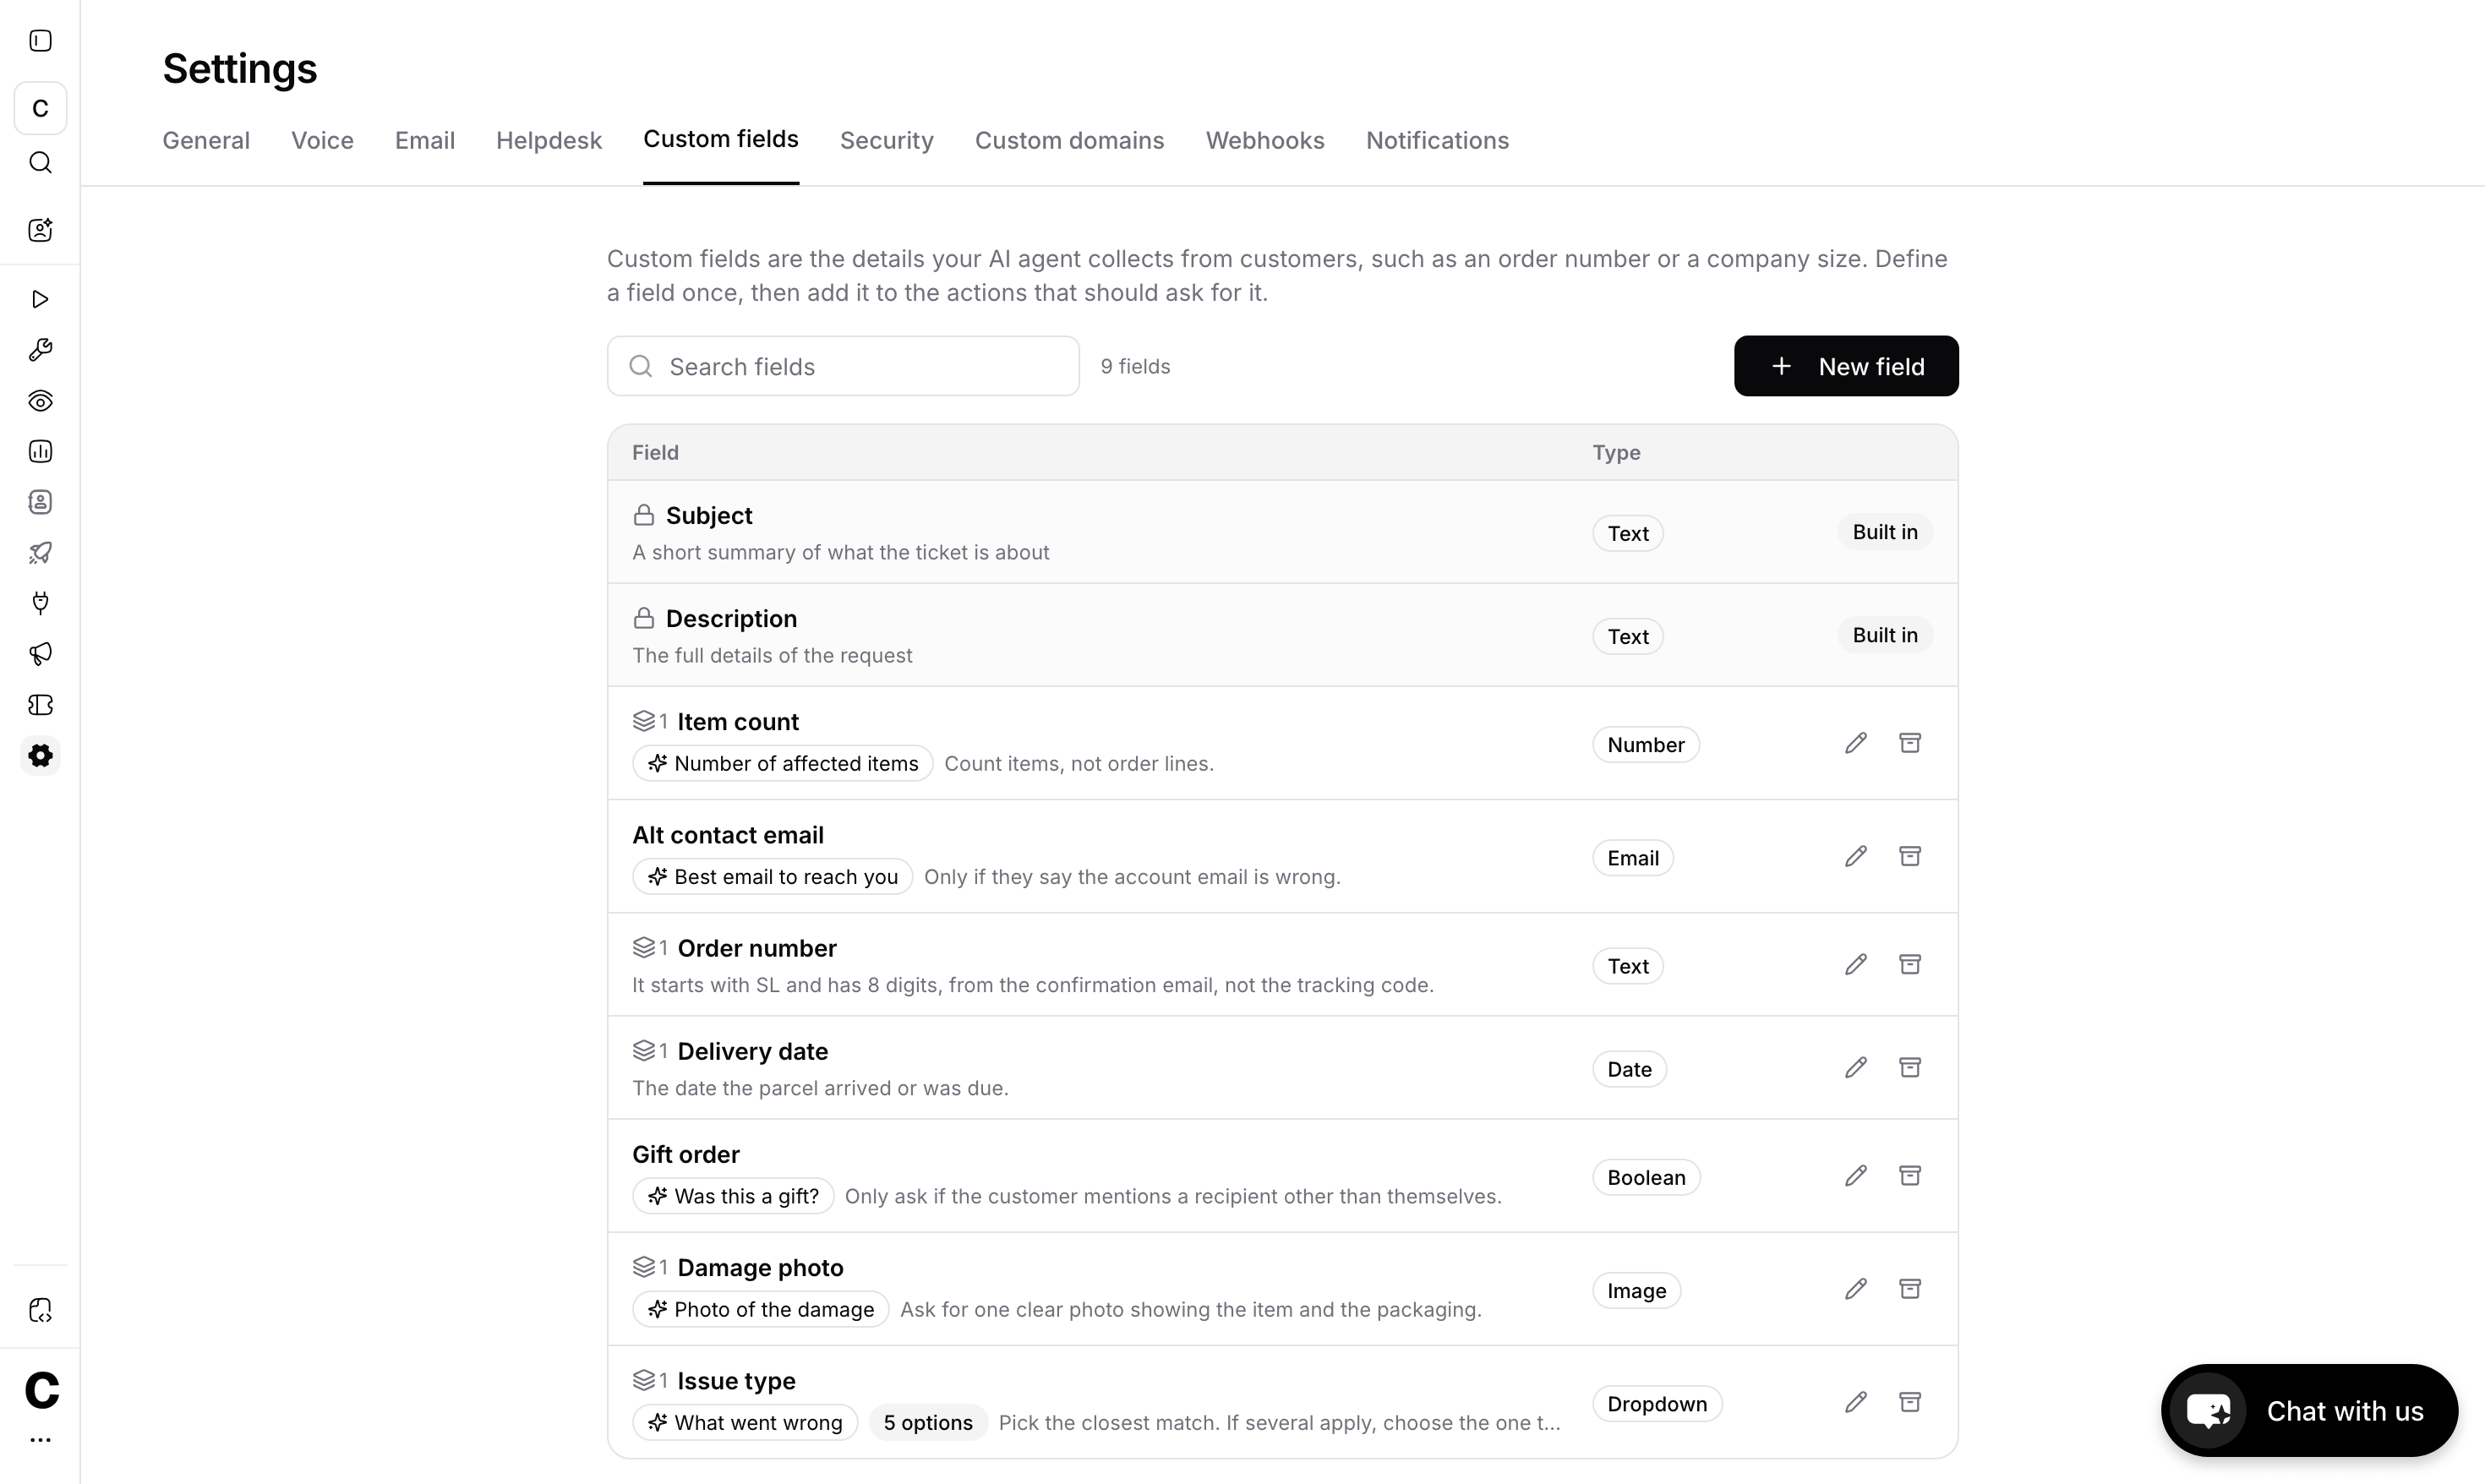
Field types
Subject and Description are built in. Every ticket has them, and you can’t create a field with either name.
Create a field
1
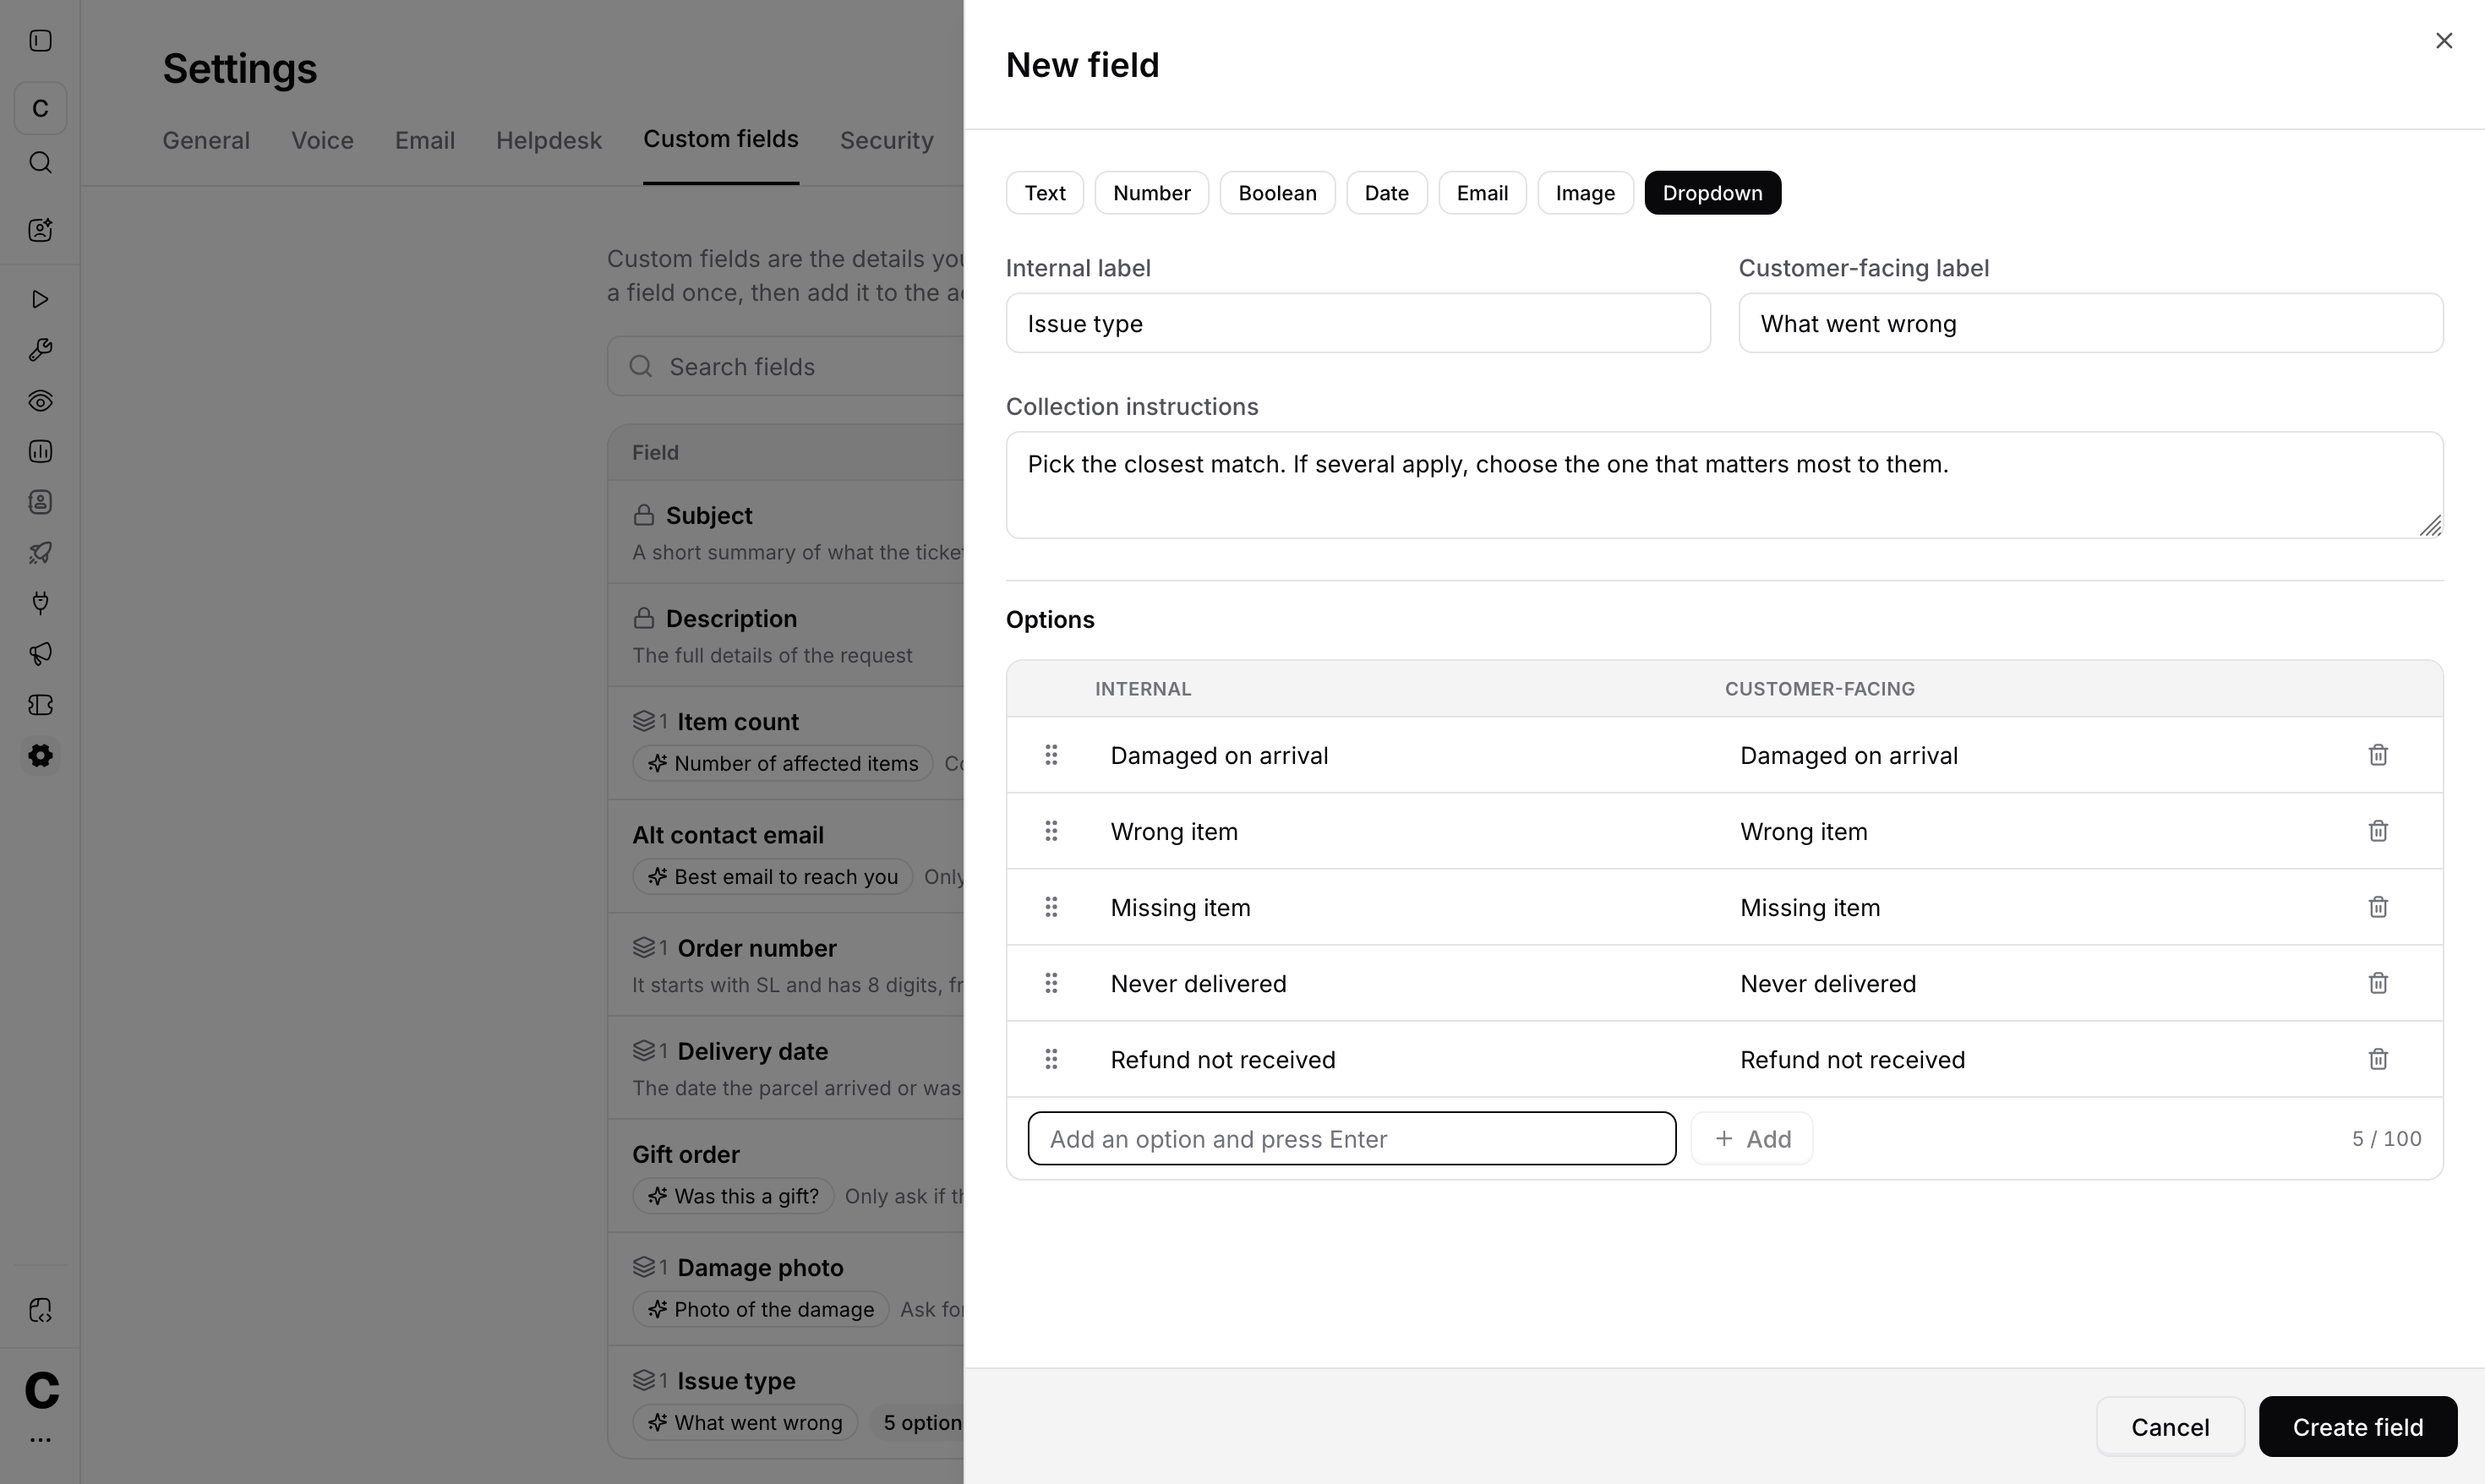
Open Custom fields
Go to Settings → Custom fields for your AI agent.
2
Add the field
Click New field, fill in the internal and customer-facing labels, and pick the type. Pick carefully, because existing ticket values depend on the type and it stays fixed while the field is in use.
3
Add a collection instruction (optional)
Tell the AI agent how to get the value, for example “Ask for the order number from the confirmation email, not the tracking code.”
4
Add options (Dropdown only)
Type an option and press Enter to add it. Options have their own internal and customer-facing labels, and you can archive an option to stop offering it without losing the tickets that already carry it.
Collect fields when creating tickets
1
Open the create-ticket action
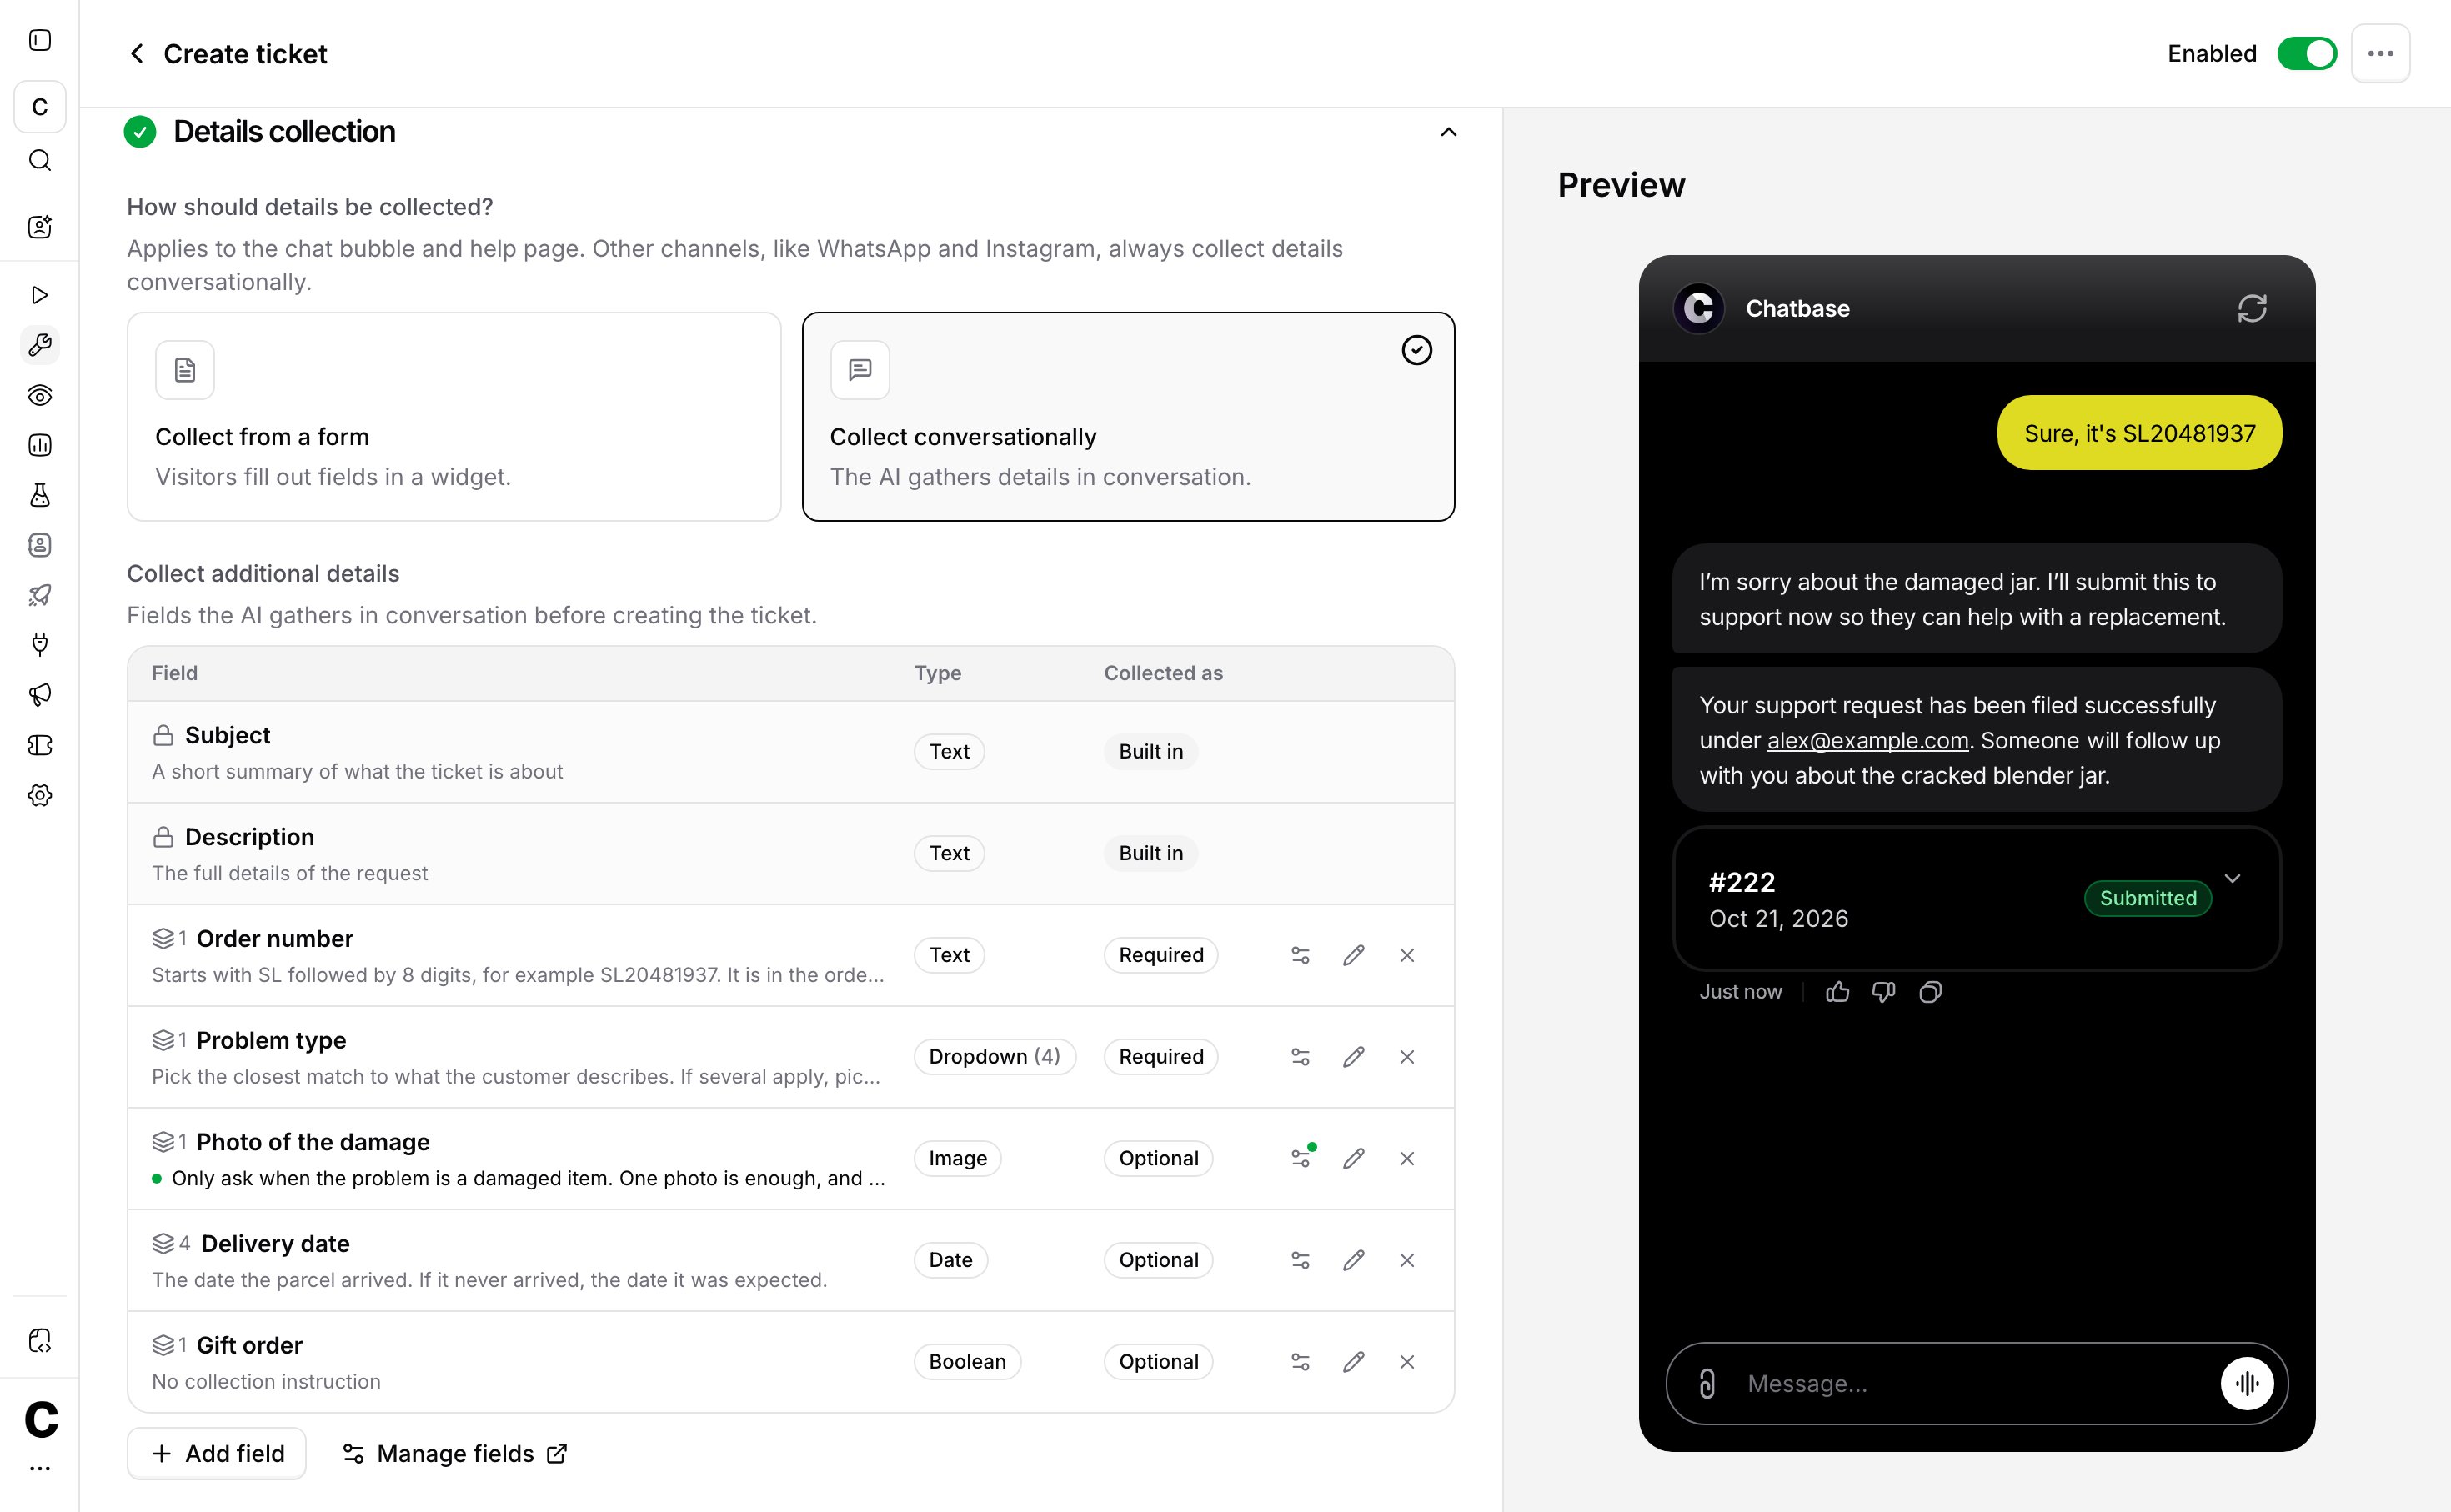
In your AI agent’s Actions, open a Create ticket action. The Collect additional details section lists the fields this action collects.
2
Add fields
Search your fields and add the ones this action should collect. You can create a new field from here too. Two fields with the same customer-facing label can’t be collected by one action, since the customer couldn’t tell them apart.
3
Set how each field is collected
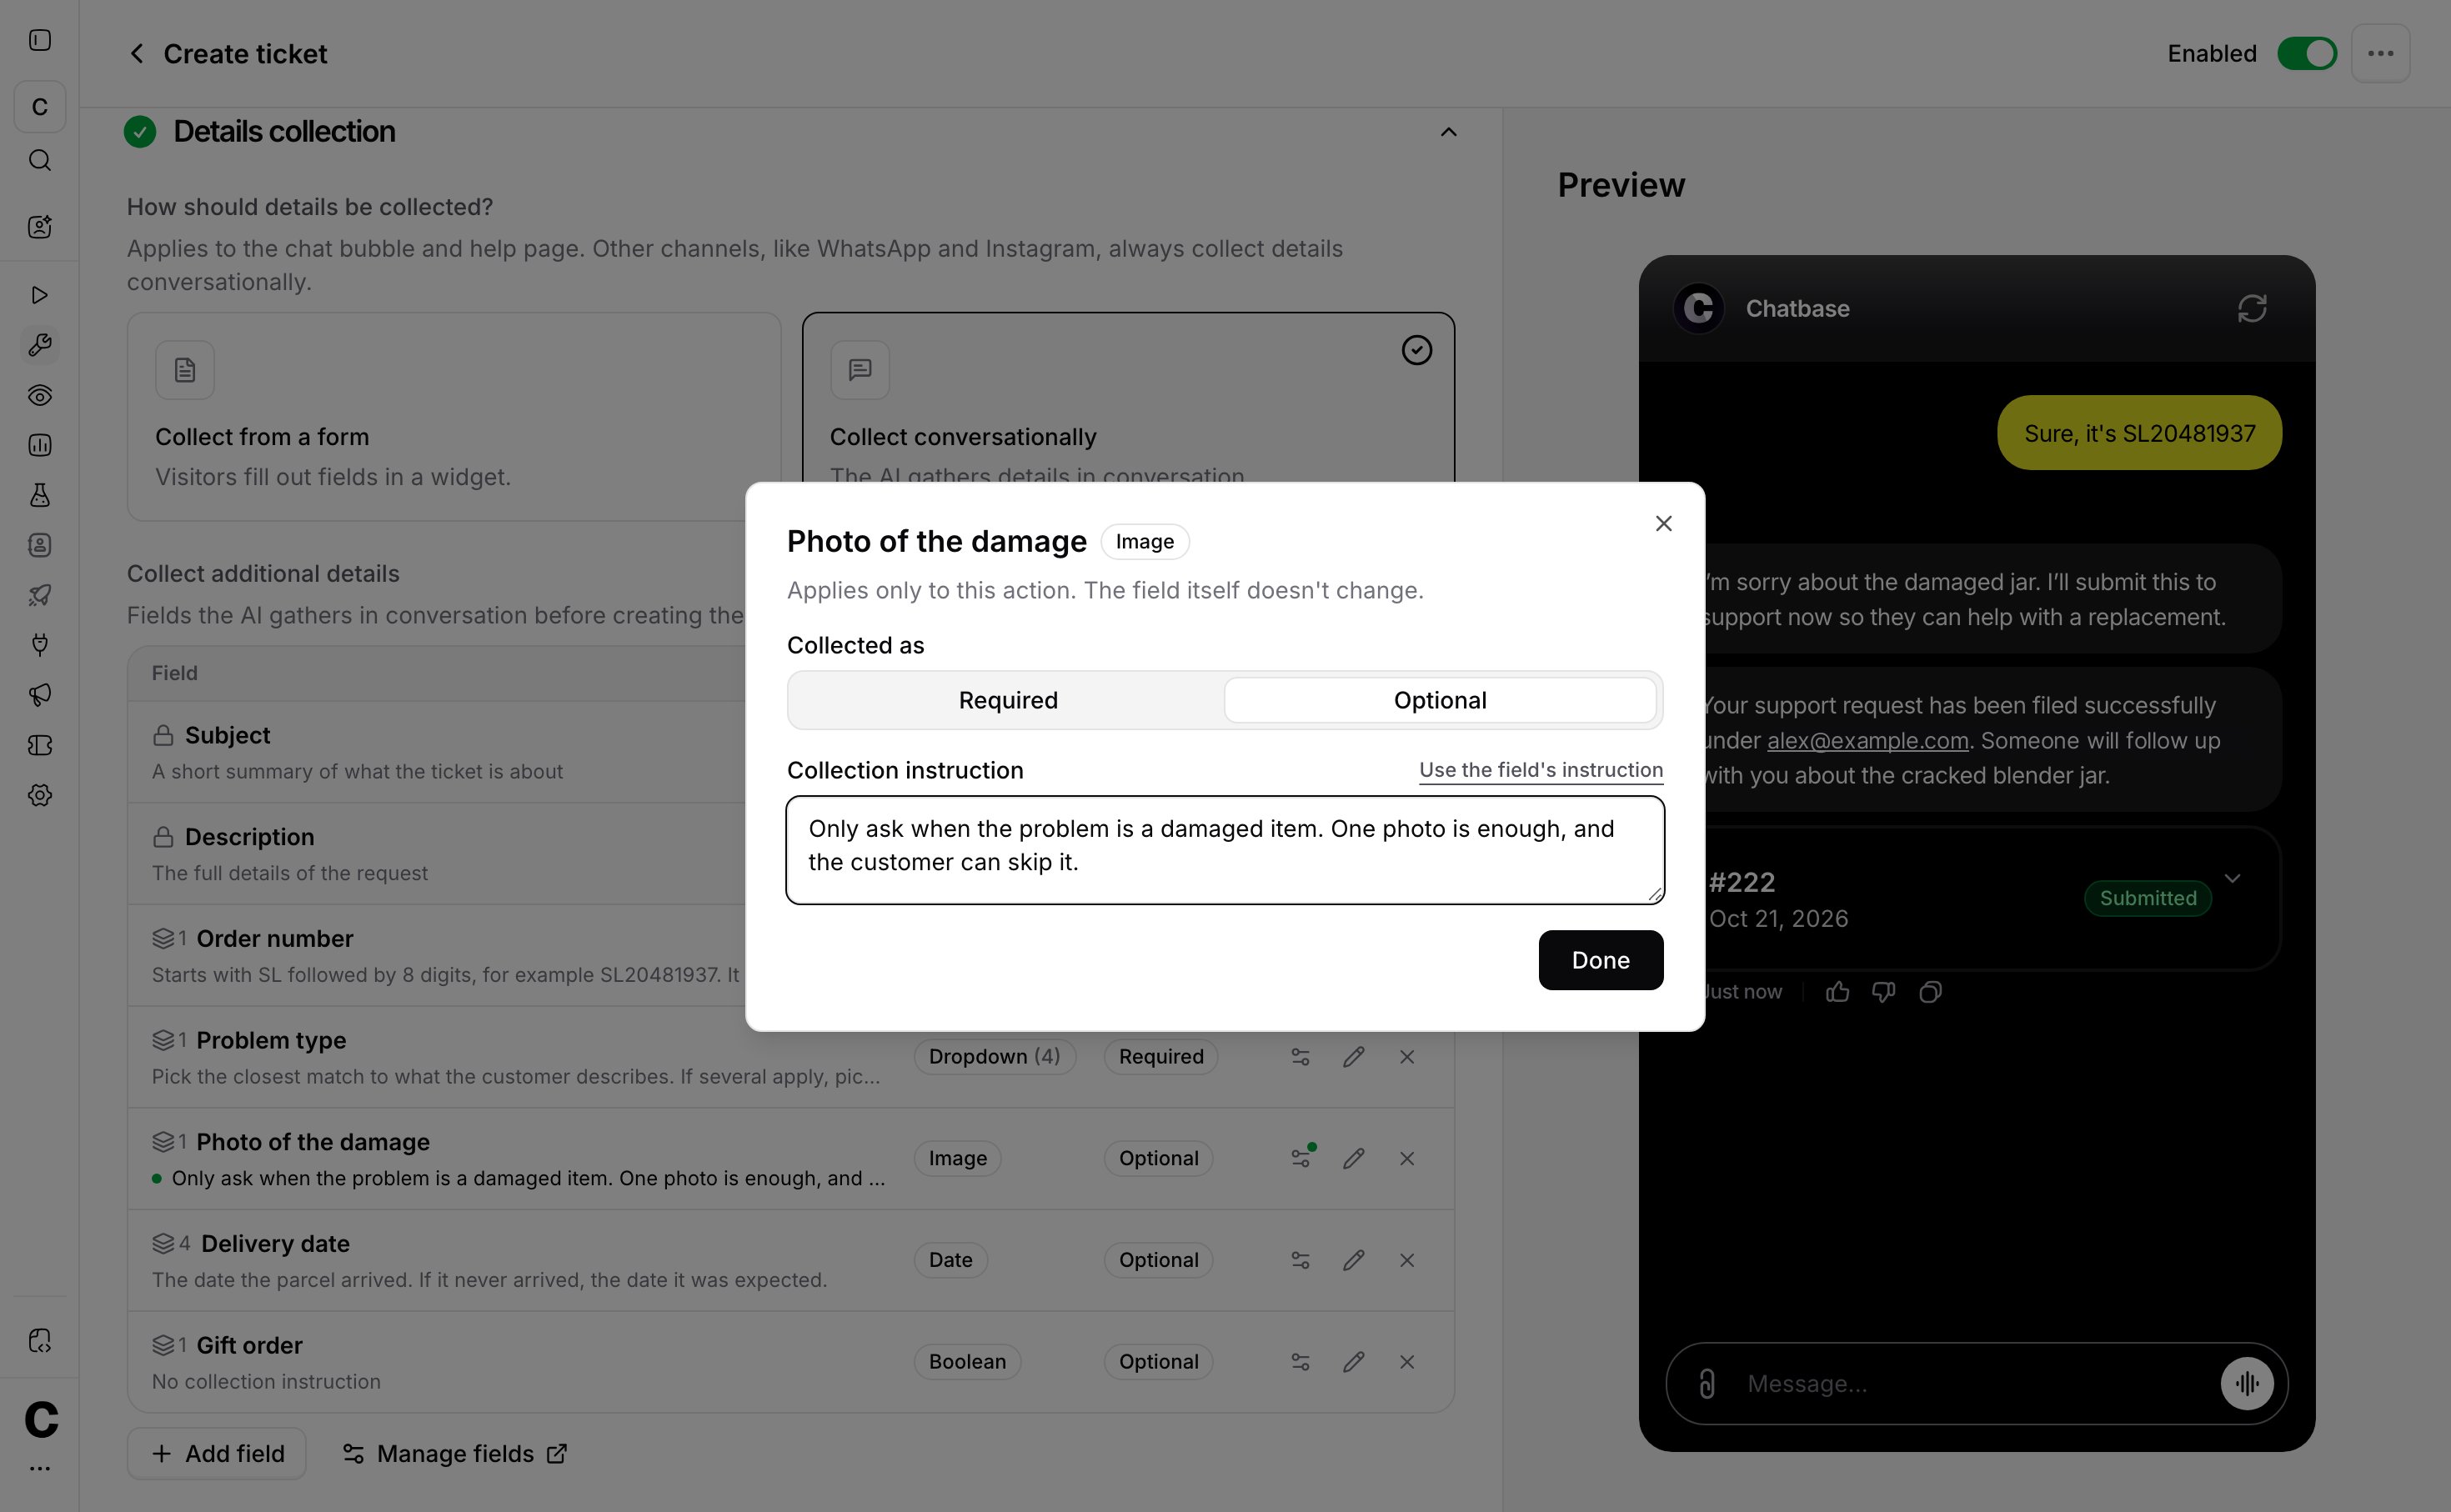
Click a field’s Required or Optional badge, or its gear, to open its settings for this action. The ticket is only created once every required field has a value. Optional fields can stay empty. Fields are added as required.
4
Customize the instruction (optional)
In the same settings, you can give the field its own collection instruction for this action only, or add one when the field has none. The field and your other actions keep the original. Changes apply when you save the action.
Field values on the ticket
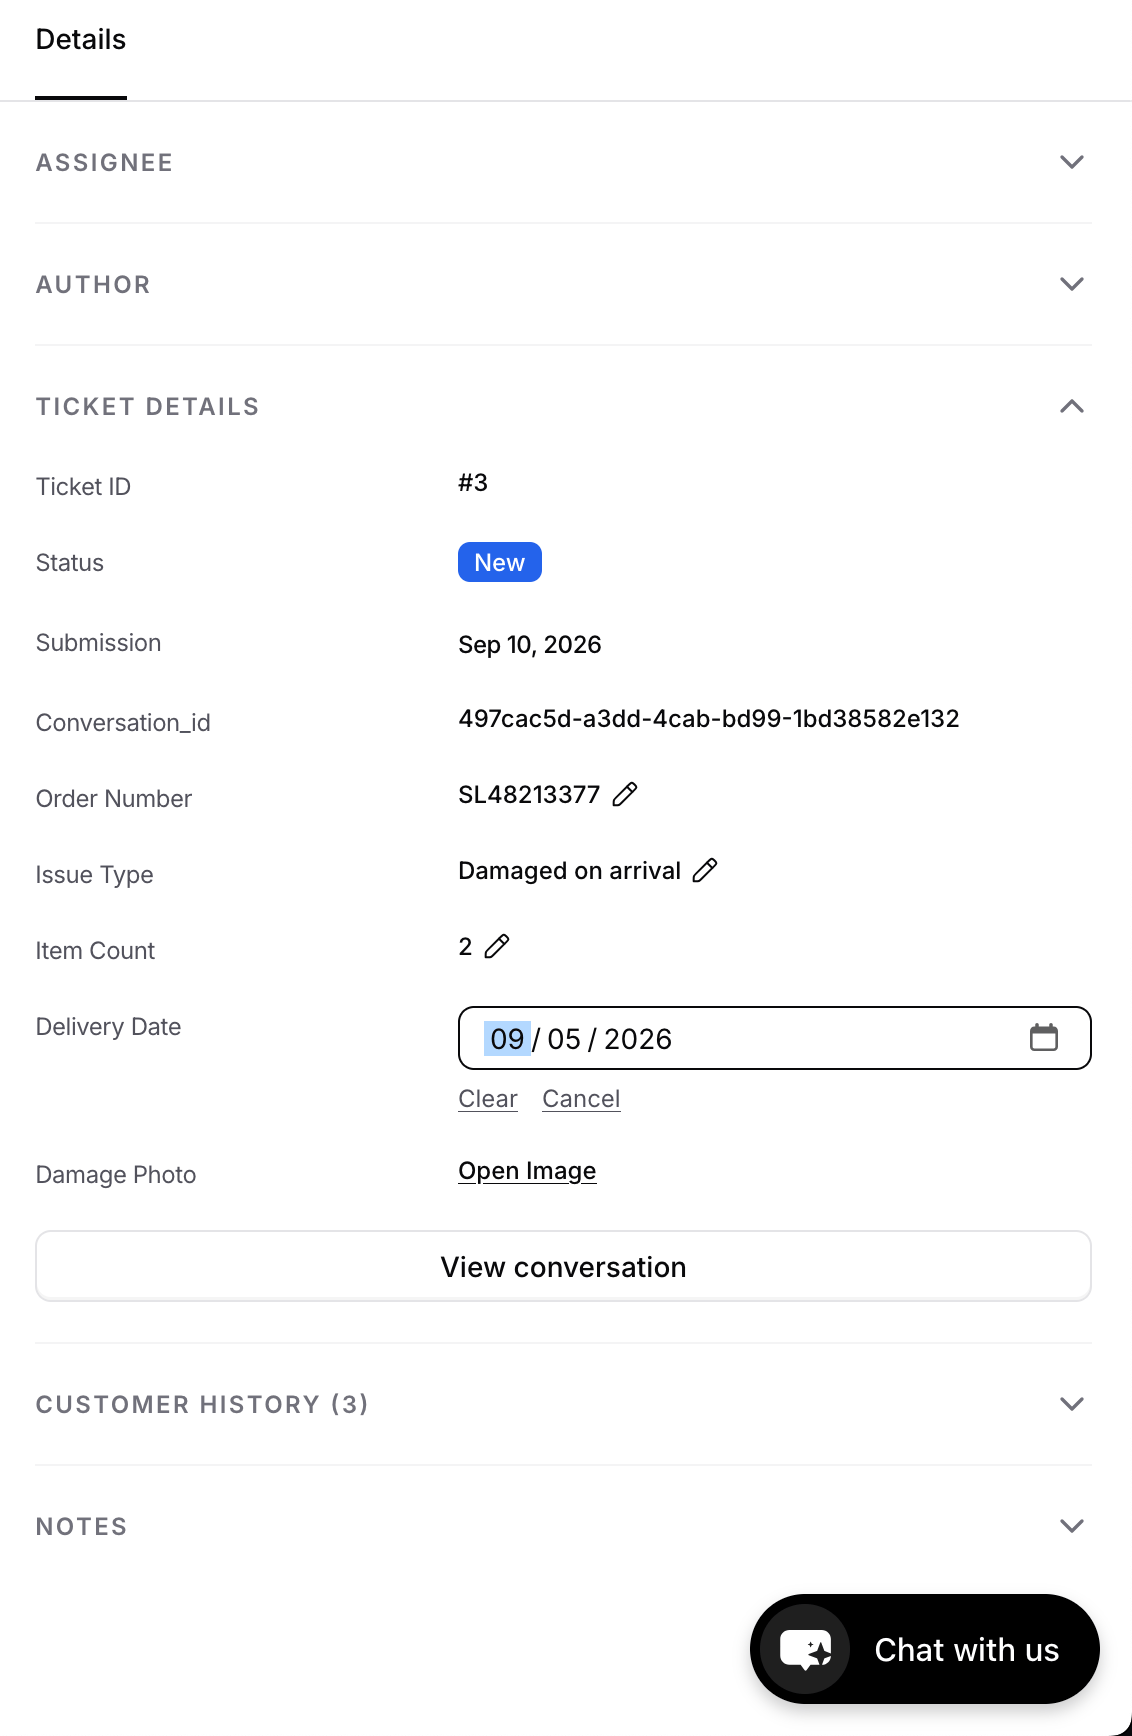
- Edit or clear a value inline from the details panel. Values are rendered by type: dates as dates, Dropdown values as their label, images as attachments.
- Follow the history in the ticket timeline. Each edit is recorded as changed Order number from A to B, with who made it.
- Filter the inbox by a field’s value, from the Filter button or in a saved view. Operators follow the field’s type, see Filters.
Archiving fields
To retire a field, archive it. Historical ticket data keeps its meaning, because a field that holds values is never deleted or retyped.- Archiving a field stops the AI agent from collecting it. Values already on tickets stay visible.
- If the field is still on any create-ticket action, you’ll be asked to confirm. It stays listed there, marked Archived and not collected, until you remove it from the action.
- Labels stay reserved while a field is archived. To bring a field back, restore it instead of creating a new one. A restored field reconnects to all of its historical values.
Delete or change the type of an archived field
Once a field is archived and no ticket holds a value for it, you can open it from Settings → Custom fields to change its type or delete it. A value cleared from a ticket no longer counts.- Changing a Dropdown to another type deletes its options.
- Deleting a field also removes it from every action that still lists it.
- Deleting can’t be undone.