

The levels
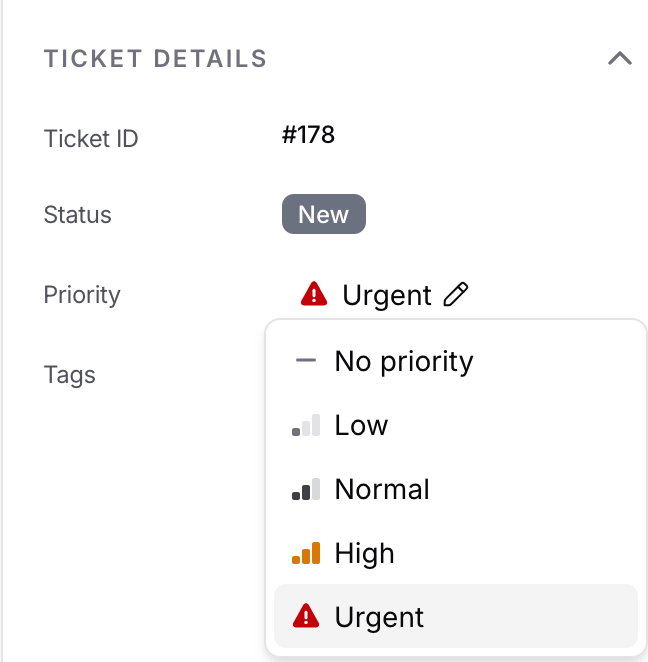
Ranked highest to lowest:- Urgent
- High
- Normal
- Low
- No priority
Setting a ticket’s priority
Open a ticket and find the Priority row in the Ticket Details section of the right-hand panel, just above Tags.1
Click the pencil
It sits next to the current priority.
2
Pick a level
Click one and it applies straight away.
Sorting the inbox
Click the Priority column header to sort by it, or pick a priority sort when building a saved view:- Priority (high → low) puts Urgent at the top and untriaged tickets at the bottom.
- Priority (low → high) reverses it, which surfaces the untriaged pile first.
Filtering by priority
Priority is available as a field in the filter builder and inside saved views.
No priority is one of the values you can pick, the same as any other level. That is worth knowing because it makes both of these work the way you would expect:
- Priority is any of No priority gives you the untriaged queue.
- Priority is none of Low returns untriaged tickets too, since No priority is genuinely not Low.
Conditions in a filter are combined with AND. To catch everything above a line, pick the levels you want in one
is any of condition rather than adding a condition per level, which would ask for tickets at several levels at once and return nothing.In the ticket list
Priority sits in the ticket list by default, directly after Status. Move or hide it from the Columns tab when creating or editing a saved view. Priority is any of Urgent, High, sorted by Priority (high → low), gives your team a standing queue of everything that cannot wait.Good to know
- Priority is internal. Customers never see it, in the chat widget or anywhere else.
- When a teammate changes the priority of a ticket you have open, it updates without a refresh.
- Anyone with access to the help desk can change a ticket’s priority. There is no separate permission for it.