

Introduction
Automations are time-based rules for your Helpdesk. Once an hour, each active automation checks your open tickets and acts on the ones that have waited longer than you allow. It can close a ticket after the customer has gone quiet for three days, or raise the priority of a ticket nobody has answered in four hours. You build them like Triggers, with conditions and actions. What differs is what starts them. A trigger runs when a ticket is created or updated. An automation runs on a schedule, so it catches the tickets where nothing happens.Automations need the Helpdesk turned on for your AI agent. If you haven’t set it up yet, see the Helpdesk overview.
Creating an automation
1
Open Automations
Go to Settings → Helpdesk → Automations and click New automation.
2
Name it
Give it a name that says what it does, such as “Close quiet tickets after 3 days”.
3
Set the wait
Every automation needs at least one time condition under Match ALL of. Pick what to measure from, then how long. See Time conditions.
4
Narrow it down
Add any other conditions, such as a status category or a team, the same way you would on a trigger.
5
Add the actions and save
Add at least one action and save. The automation starts acting on the next hourly check.
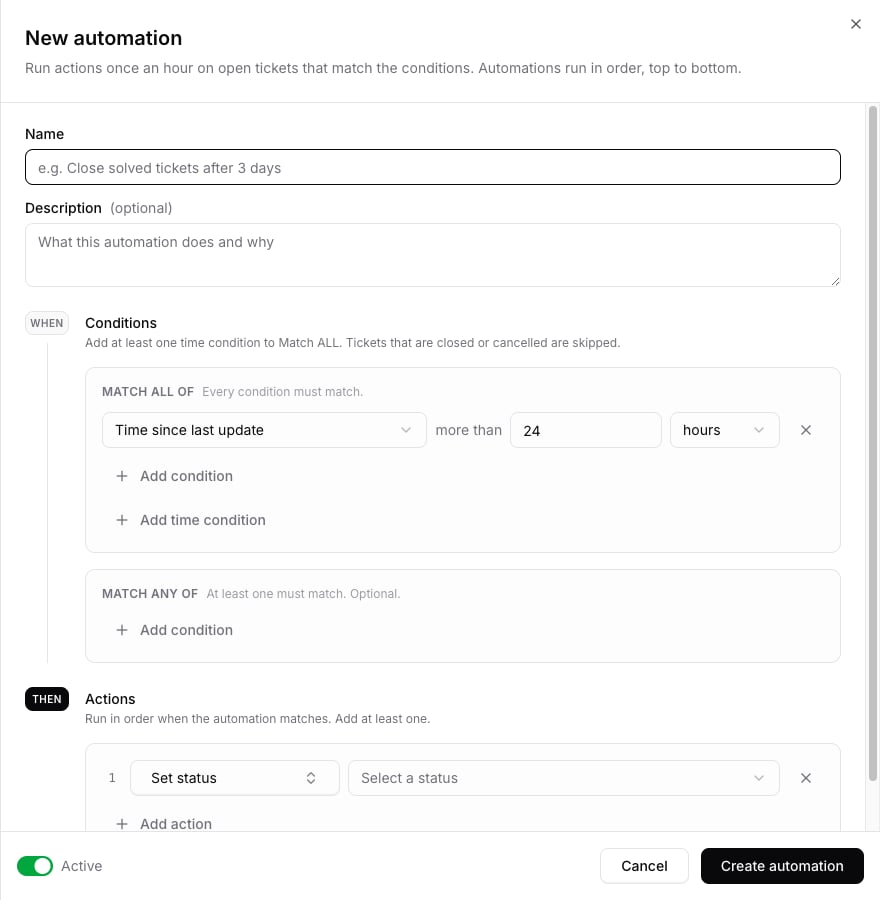
Time conditions
Each time condition counts from a different point on the ticket.
Time conditions go in Match ALL of only, so when an automation has several, all of them have to pass.
Other conditions
Automations take the ticket and contact conditions from Triggers. They compare the ticket as it is when the automation runs.Actions
Automations take the actions from Triggers. Your triggers see an automation’s change as an update. A trigger onStatus changed to Closed runs after an automation closes a ticket, the same as after an agent does.
When an automation acts
Automations only act on open tickets, never on closed or cancelled ones. An automation acts on a ticket once. It acts again only after one of the events it measures from happens again and the wait passes again. Say an automation sends a reminder 2 days after the last agent reply. It reminds the customer once. It reminds them again only if an agent replies and another 2 days go by without an answer. When several automations match the same ticket, they act on it in list order, top to bottom. Editing an automation’s conditions starts it over, so it can act again on tickets it already handled. Editing only the name, description or actions keeps its history. Because automations check once an hour, one can act up to an hour after a ticket’s wait ends. Each run acts on up to 1,000 tickets per automation. A new automation on a large backlog works through it over a few hours. Each time an automation acts on a ticket, the conversation shows a ⚡ entry naming the automation and listing what it changed, like a trigger run. Click the name to open the automation. Triggers that react to the change get their own entry right after it.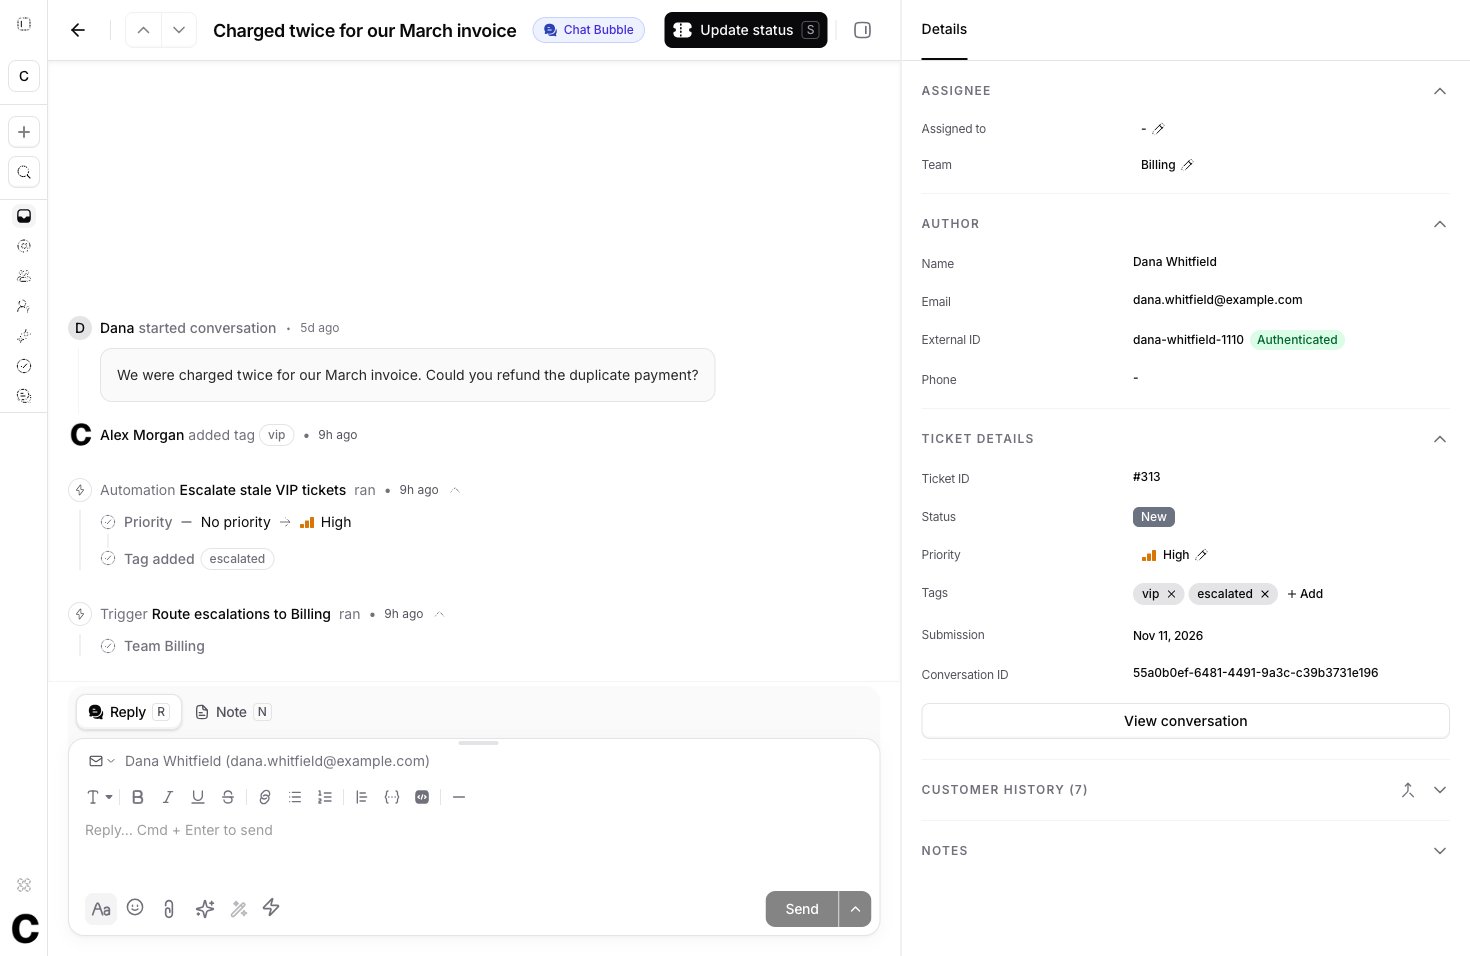
Examples
Close tickets the customer stopped answering
- Match ALL of: Time since last agent reply more than 3 days, and Status category is On customer
- Actions: Send email to the requester saying the ticket was closed, then Set status category to Closed
Flag tickets nobody has answered
- Match ALL of: Time since last customer message more than 4 hours, and Last message from is Customer
- Actions: Set priority to High, then Send Slack message to your support channel