

Step 1: Sign Into Your Chatbase Account and Copy Your Embed Code
1. Log into your Chatbase account and navigate to your dashboard. 2. On the list of available agents, click on the one you want to integrate into your Framer website. 3. Click Channels in the left sidebar, then click Manage on the Chat bubble card (or Setup, if you haven’t configured it yet). 4. Click on Deploy and select the Website widget embed type. Scroll down and Click Copy to copy the provided script.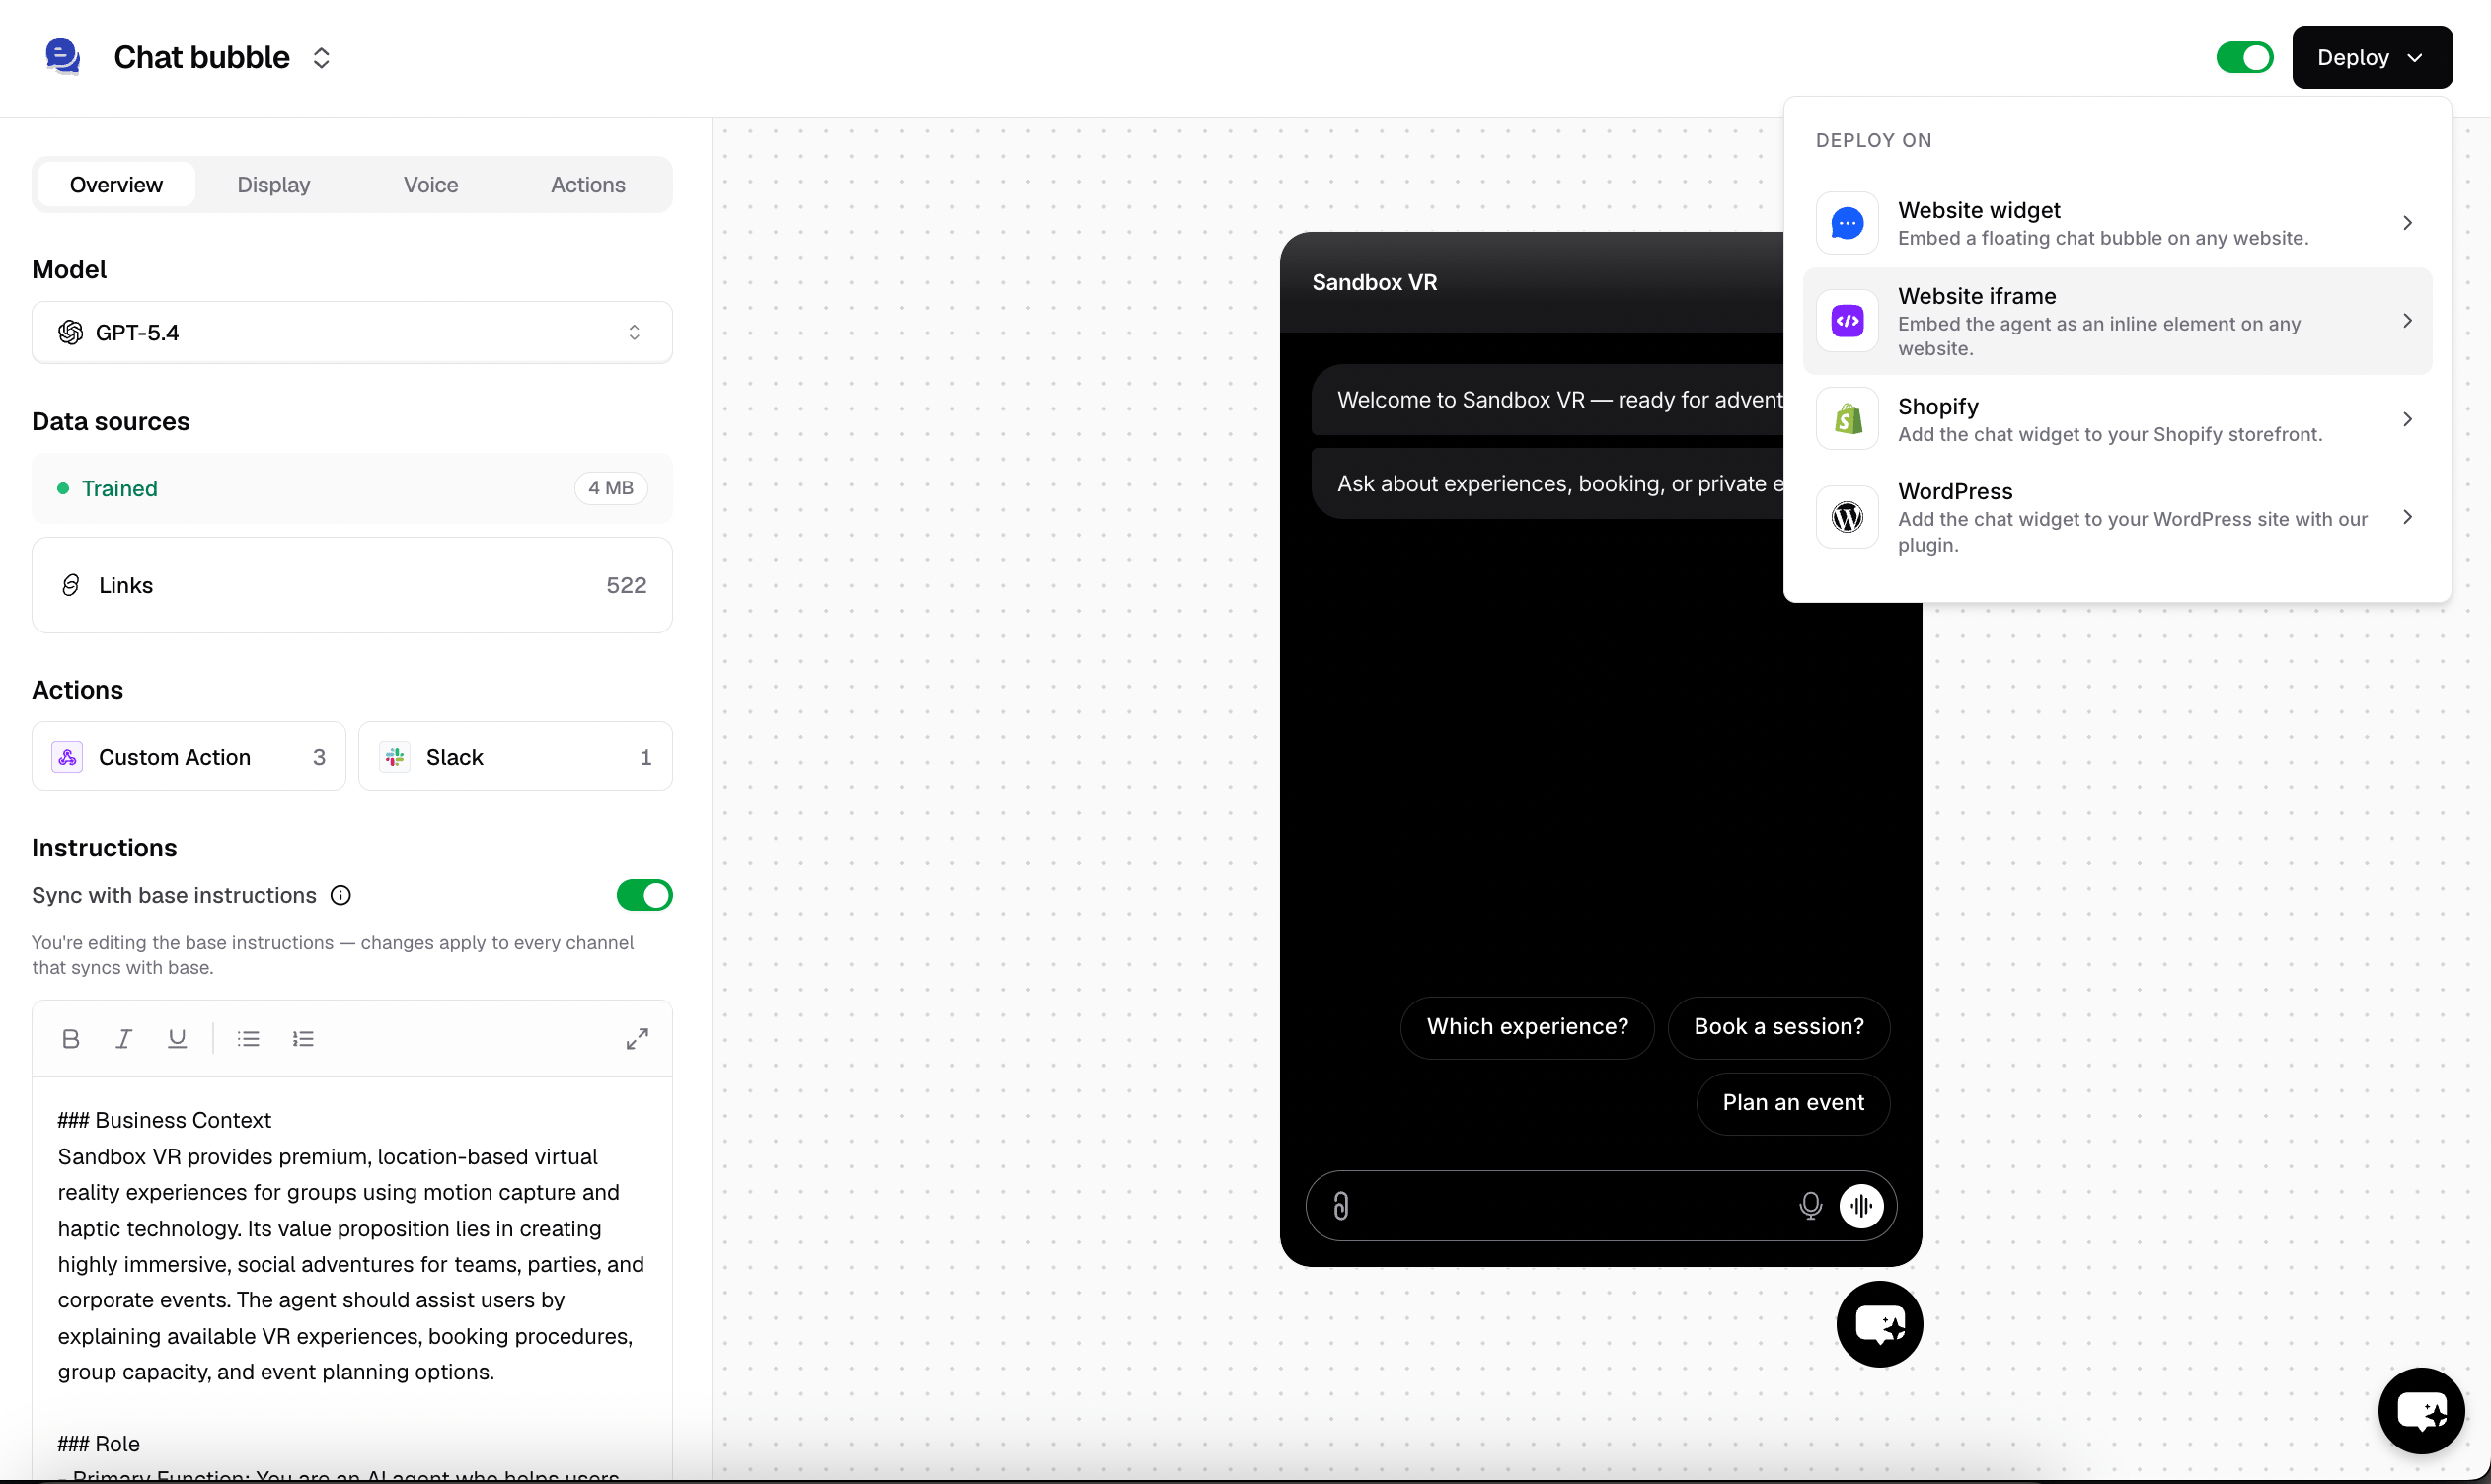
Step 2: Sign Into Your Framer Website and Embed Your AI agent
1. Sign in to your Framer website and head to your project dashboard 2. Click on the website project you wish to embed your Chatbase agent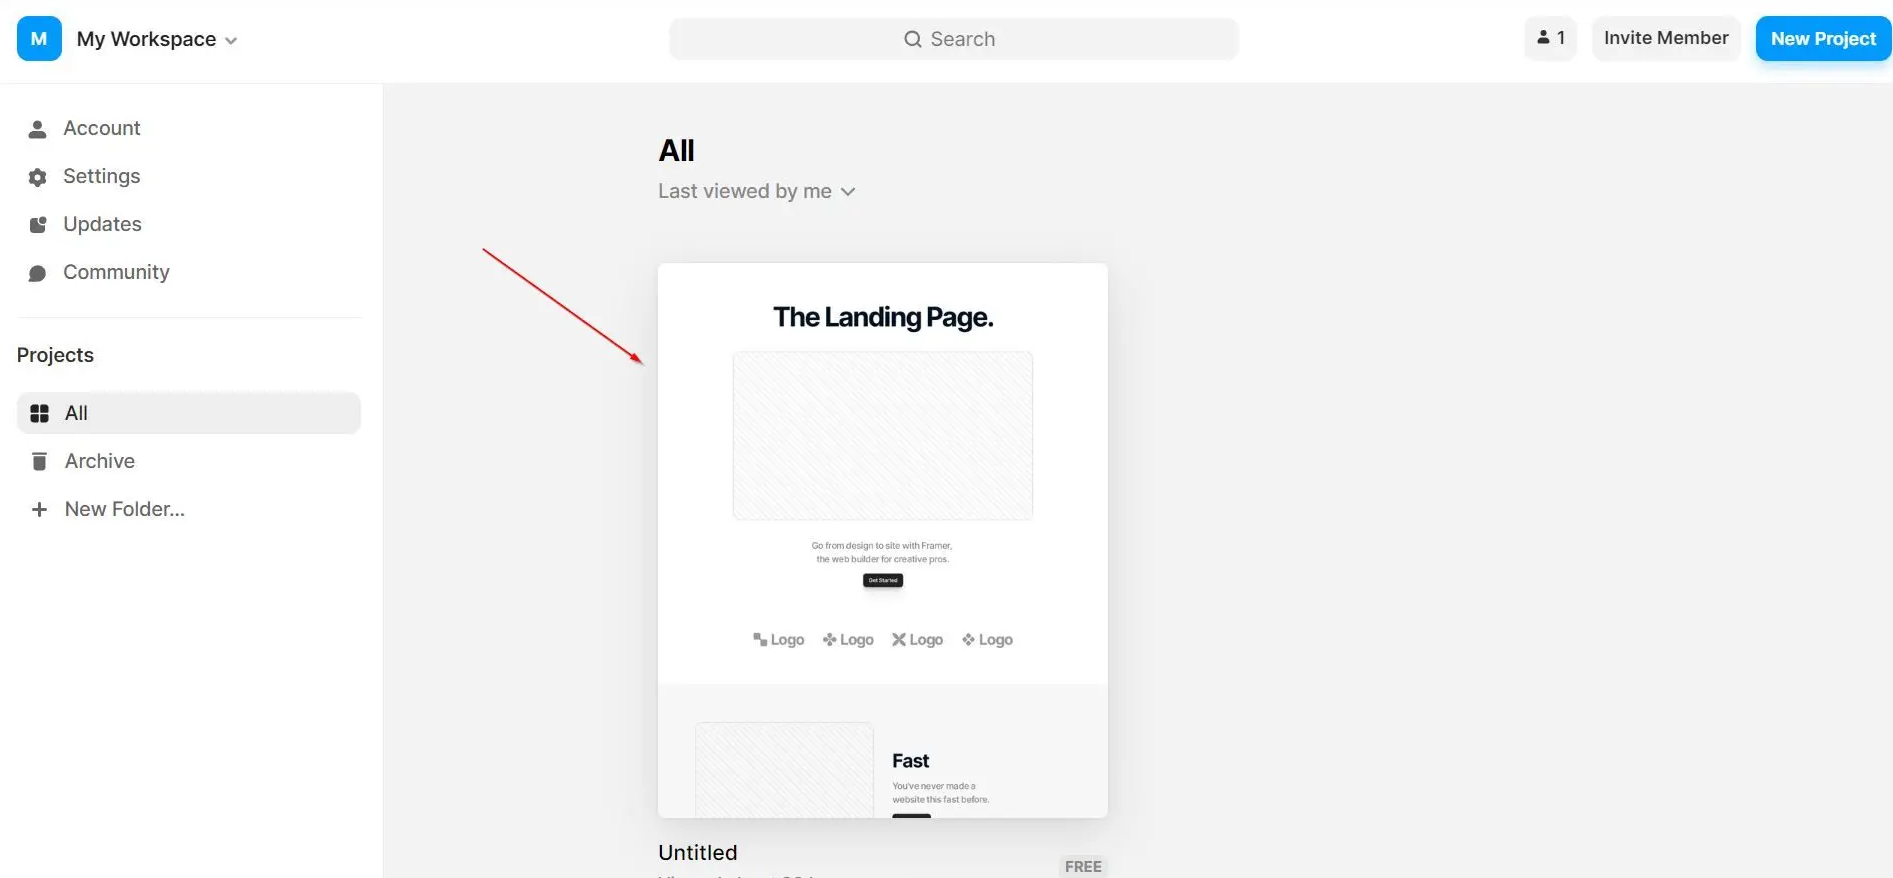
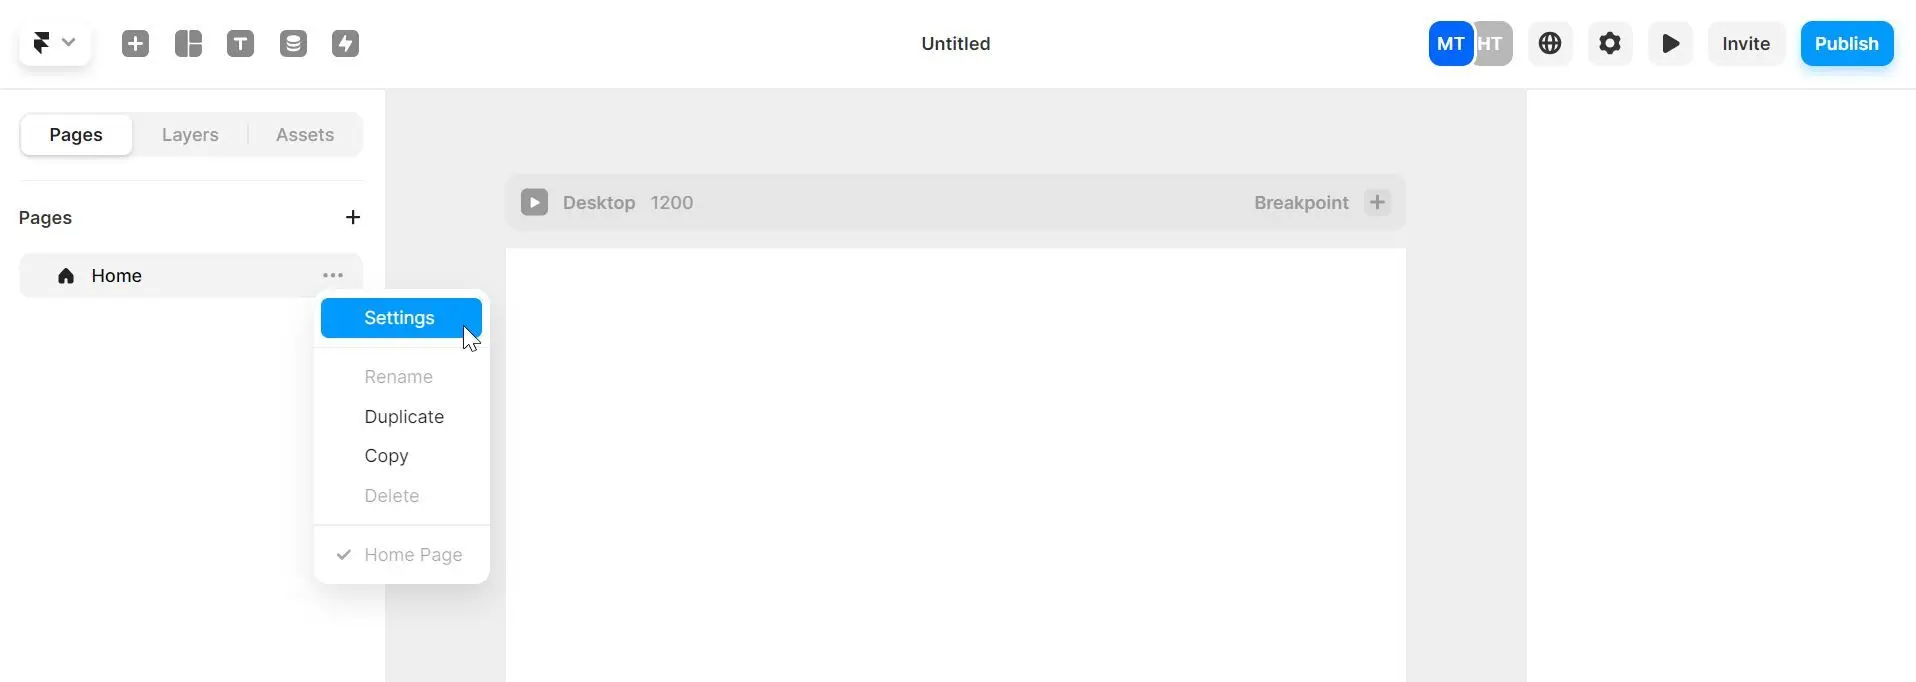
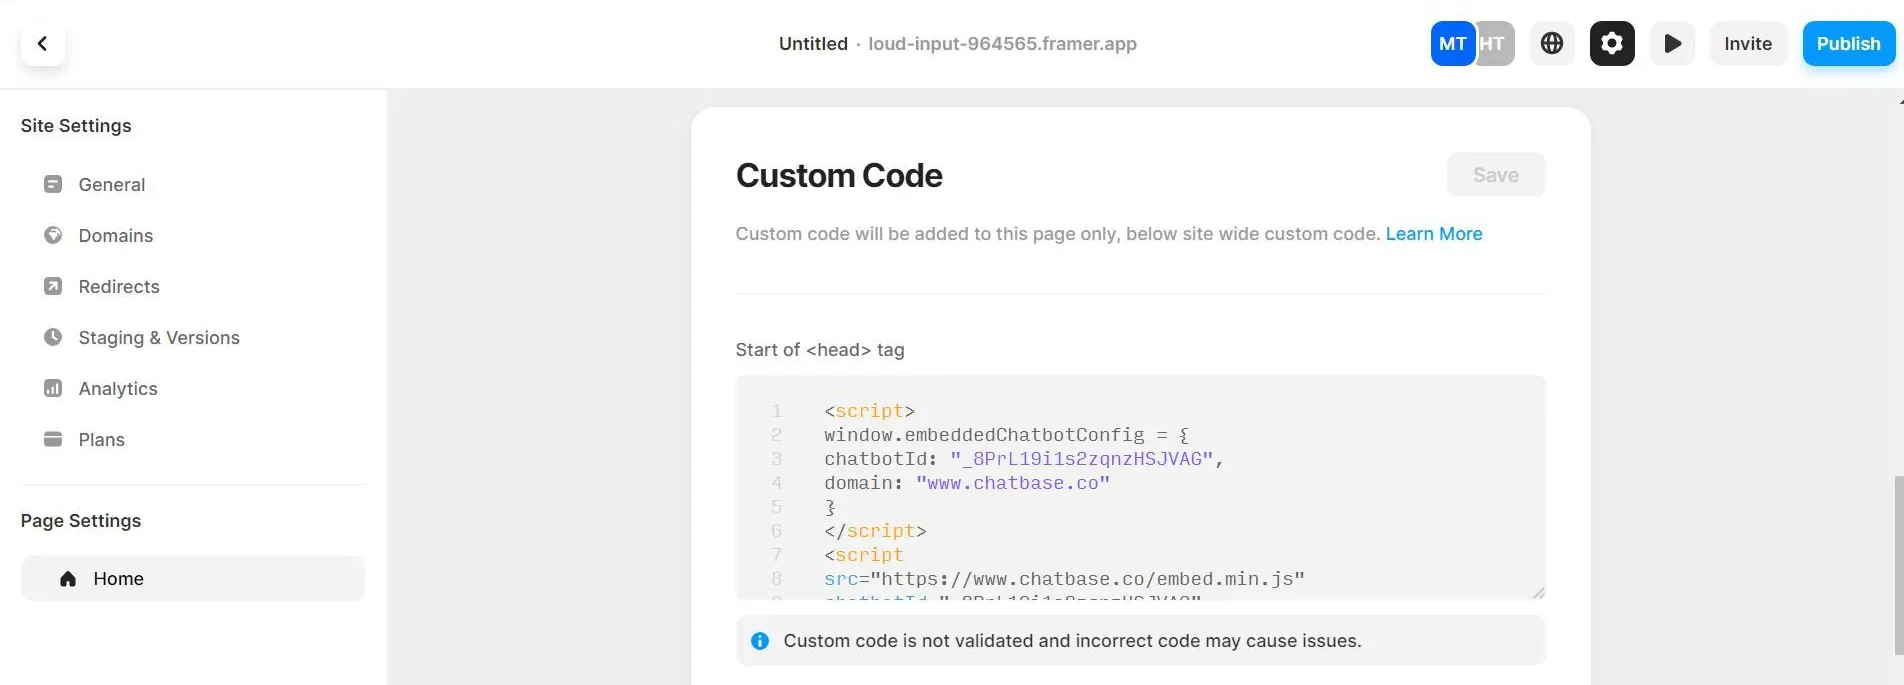

You can customize the appearance and colors of your agent on your Chatbase dashboard. To do this, go to your dashboard, choose an agent, click Channels in the left sidebar, click Manage on the Chat bubble card, then open the Display tab to edit Content, Capabilities, Colors, Floating bubble, and Localization.