> ## Documentation Index
> Fetch the complete documentation index at: https://chatbase.co/docs/llms.txt
> Use this file to discover all available pages before exploring further.
# Zendesk Messaging
> Let your AI agent answer customers in your Zendesk Messaging channels and hand chats to your team in Zendesk
## Overview
Connect Zendesk Messaging and your AI agent answers customers in the Zendesk channels you pick, like your Web Widget or mobile apps. When a customer needs a person, the AI agent passes the chat to your team in Zendesk.
This is not the [Zendesk](/docs/user-guides/integrations/zendesk) integration. That one works with tickets. You can use both.
## Before you start
* A Chatbase **Standard** plan or above.
* Admin access to a Zendesk account with at least one Messaging channel.
* If this AI agent uses [Sunshine](/docs/user-guides/integrations/sunshine), disconnect Sunshine first. An AI agent can't use both.
## How to connect Zendesk Messaging
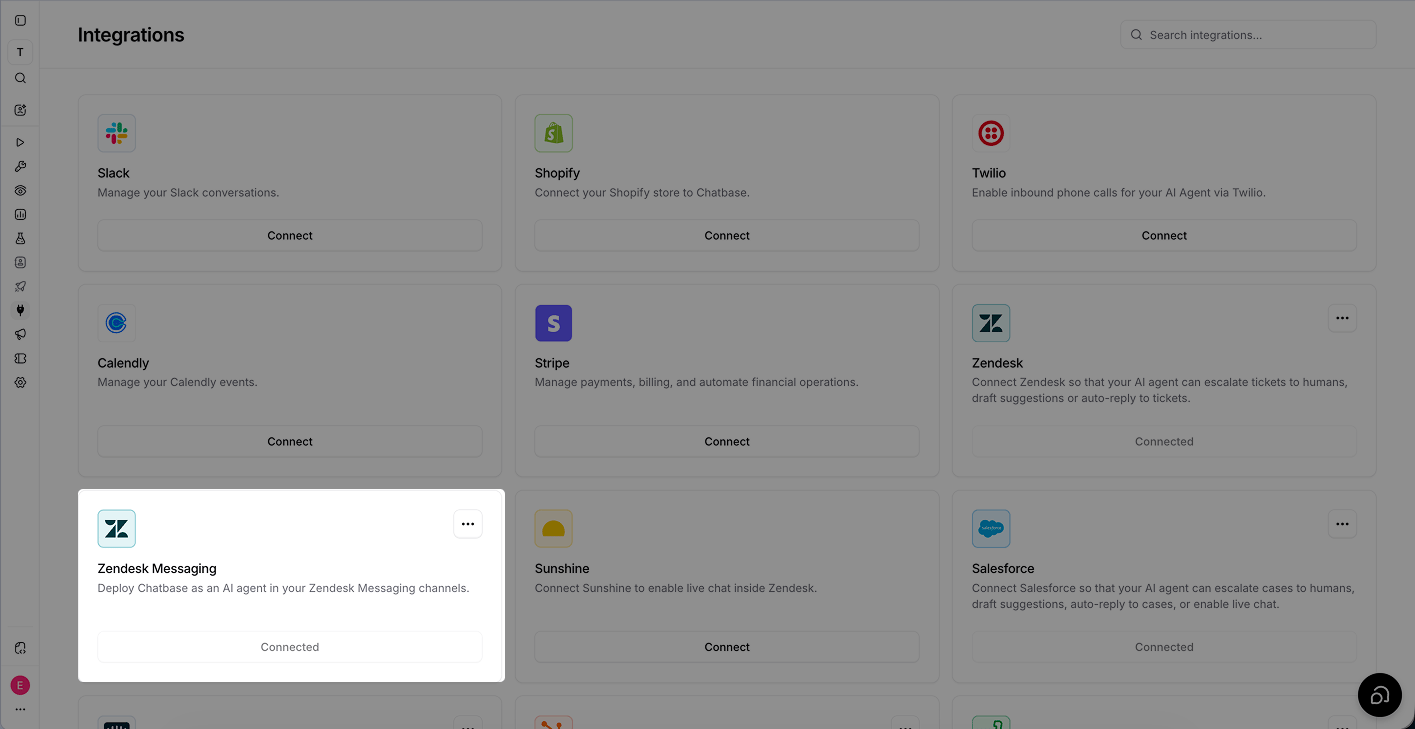
Open your AI agent in the [dashboard](https://www.chatbase.co/dashboard/) and go to **Integrations**. On the **Zendesk Messaging** card, click **Connect**.
A Zendesk window opens. Sign in and allow access. The card then shows **Connected**.
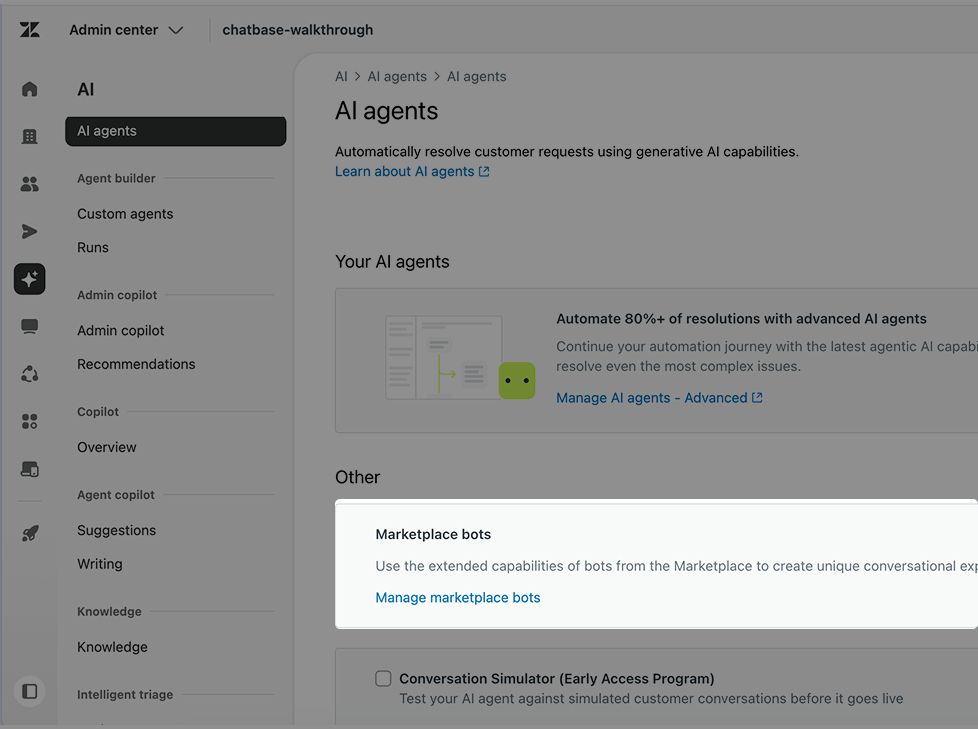
 In Zendesk Admin Center, go to **AI > AI agents**. Under **Marketplace bots**, click **Manage marketplace bots**.
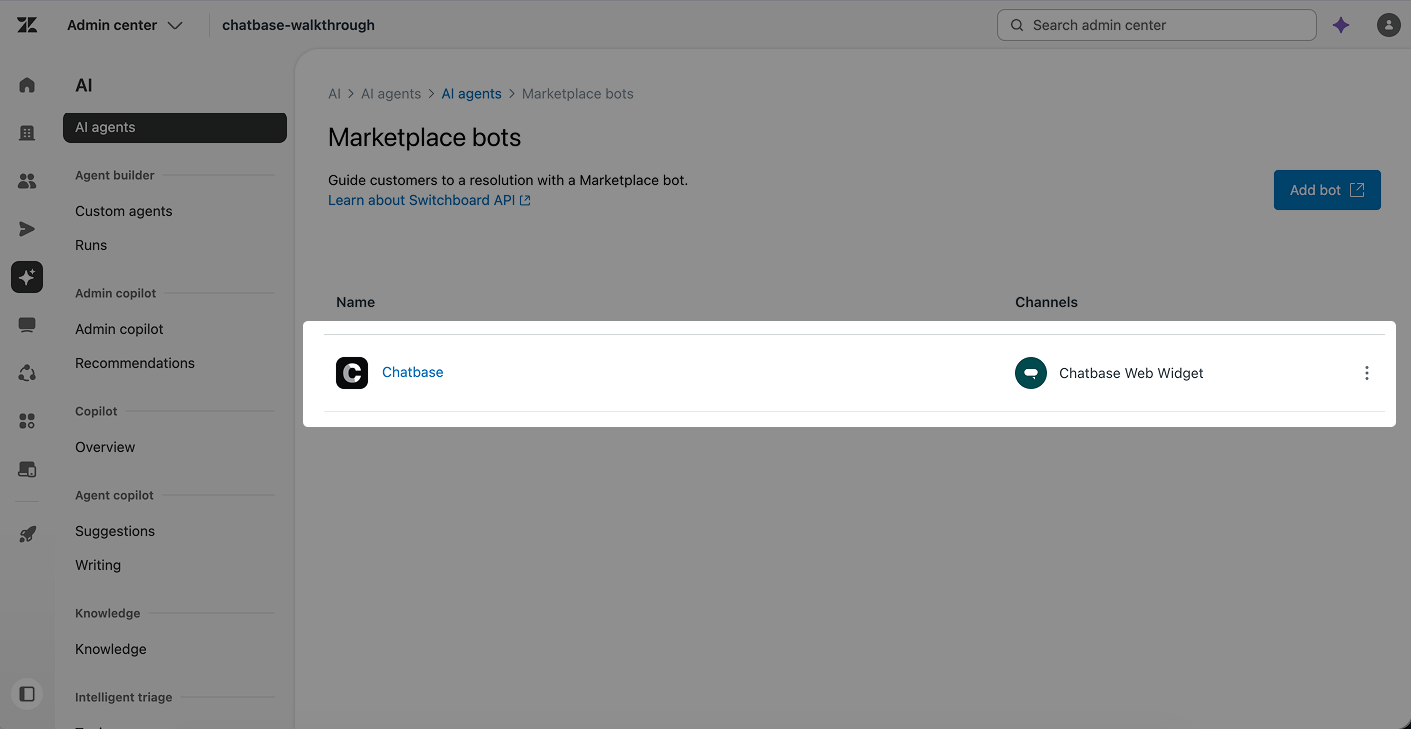
 Click **Chatbase**.
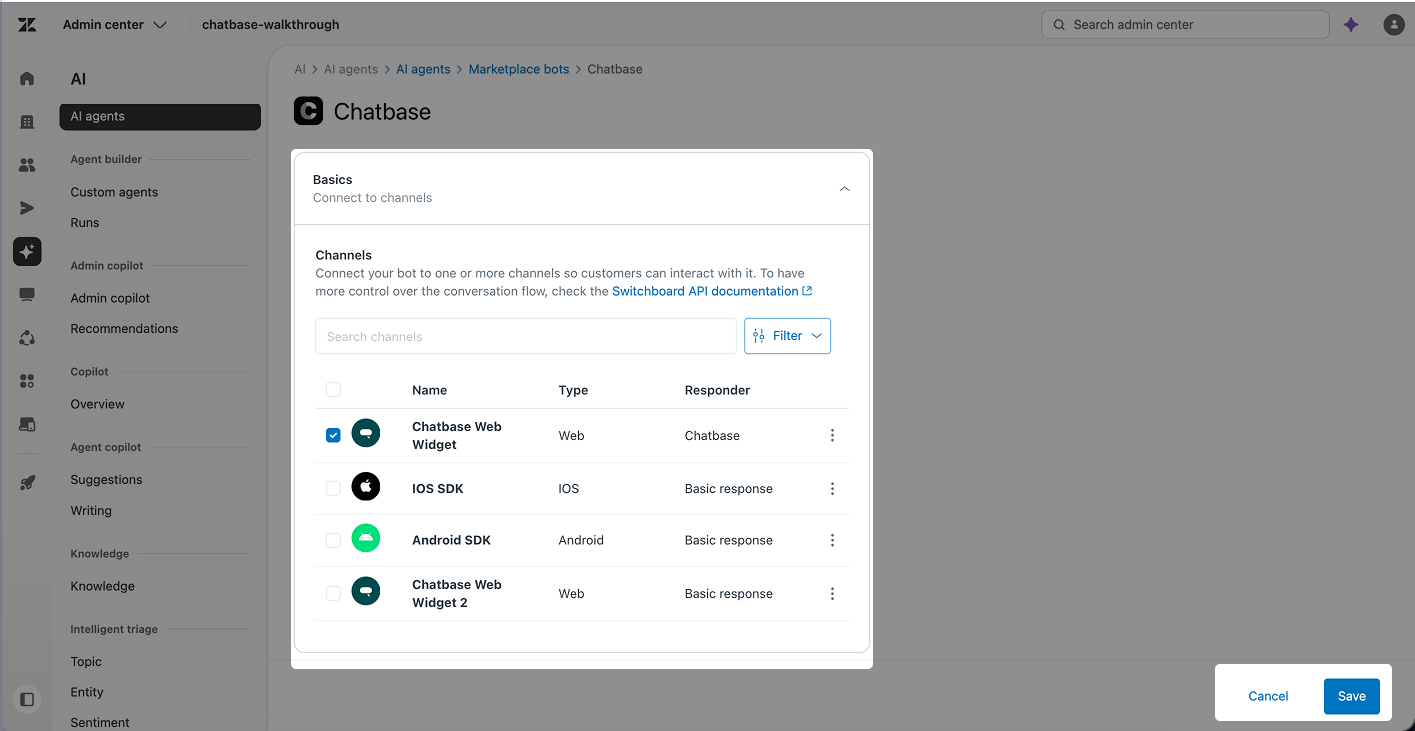
 Under **Channels**, select each channel Chatbase should answer, then click **Save**. The **Responder** column changes to **Chatbase**.
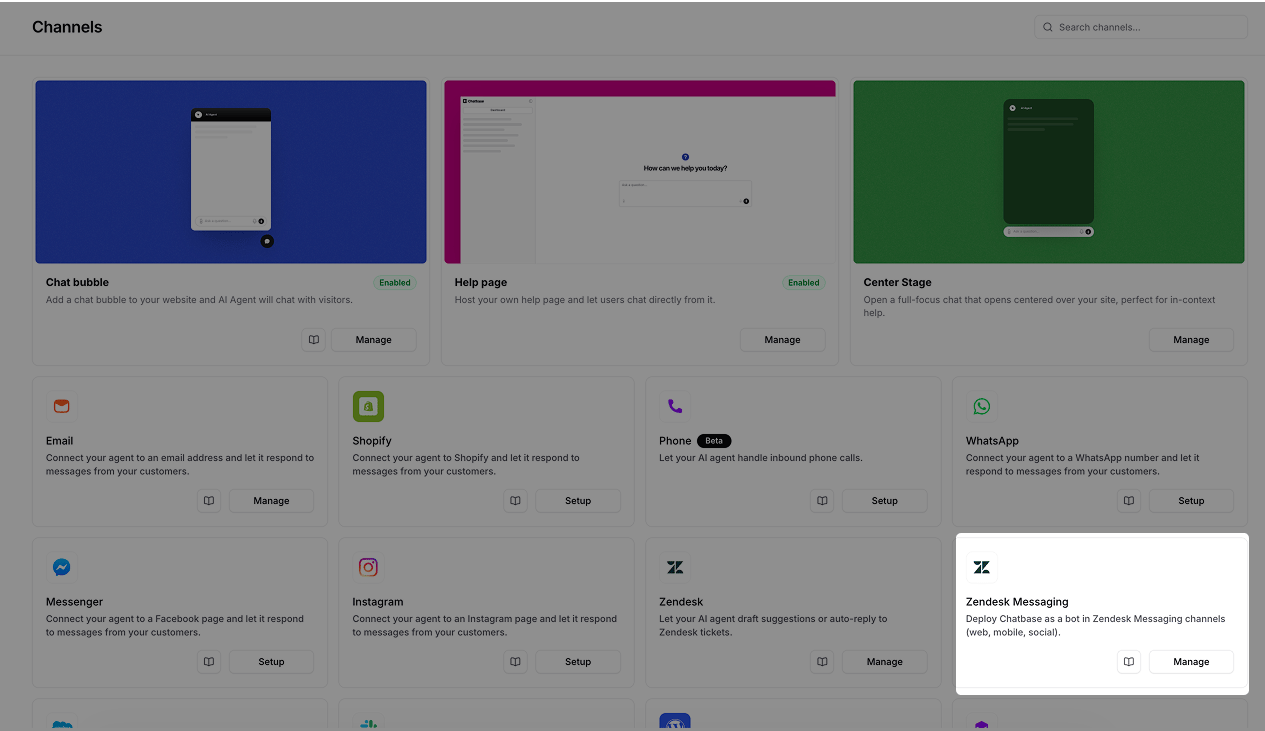
 In Chatbase, go to **Channels**. On the **Zendesk Messaging** card, click **Manage**.
 Open the **Connections** tab. Turn on each channel this AI agent should answer, then click **Save**.
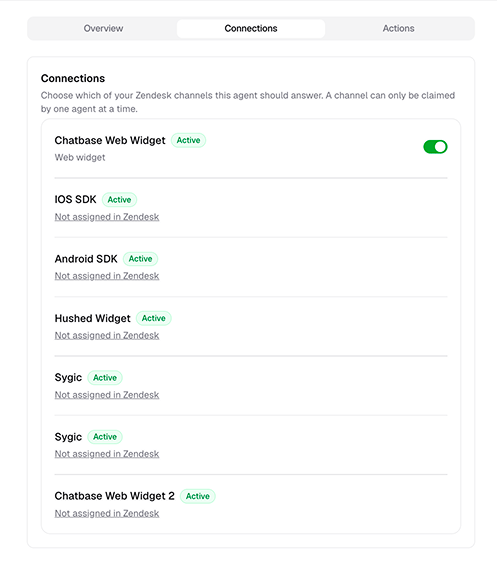 Your AI agent doesn't answer any channel until you turn it on here.
A channel showing **Not assigned in Zendesk** wasn't selected in the previous step. Each channel can have one AI agent, so a channel another agent already answers shows **Used by agent** with that agent's name.
Send a message in one of the channels you turned on, like your Zendesk Web Widget. Your AI agent replies.
## Hand off to a human
Add the **Live chat** action so your AI agent can pass a chat to your team in Zendesk Agent Workspace.
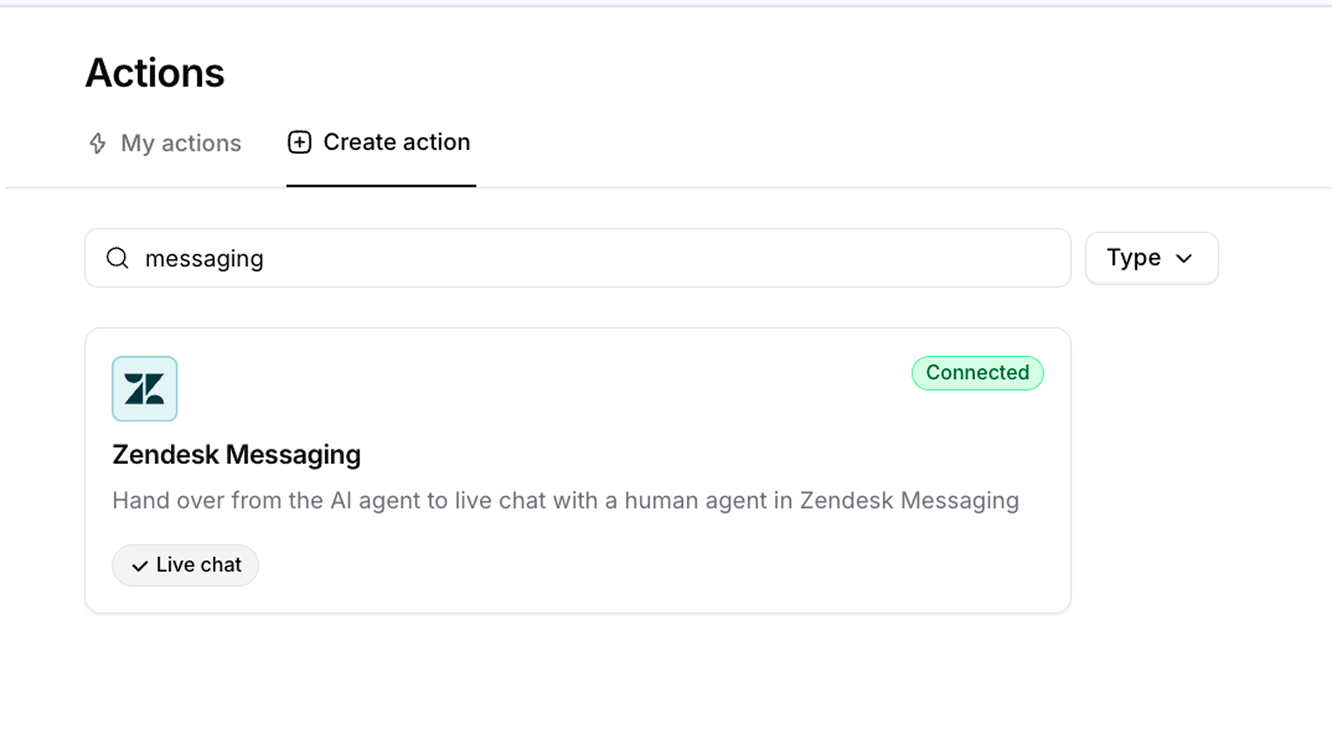
Go to **Build > Actions** and open **Create action**. On the **Zendesk Messaging** card, click **Live chat**.
Your AI agent doesn't answer any channel until you turn it on here.
A channel showing **Not assigned in Zendesk** wasn't selected in the previous step. Each channel can have one AI agent, so a channel another agent already answers shows **Used by agent** with that agent's name.
Send a message in one of the channels you turned on, like your Zendesk Web Widget. Your AI agent replies.
## Hand off to a human
Add the **Live chat** action so your AI agent can pass a chat to your team in Zendesk Agent Workspace.
Go to **Build > Actions** and open **Create action**. On the **Zendesk Messaging** card, click **Live chat**.
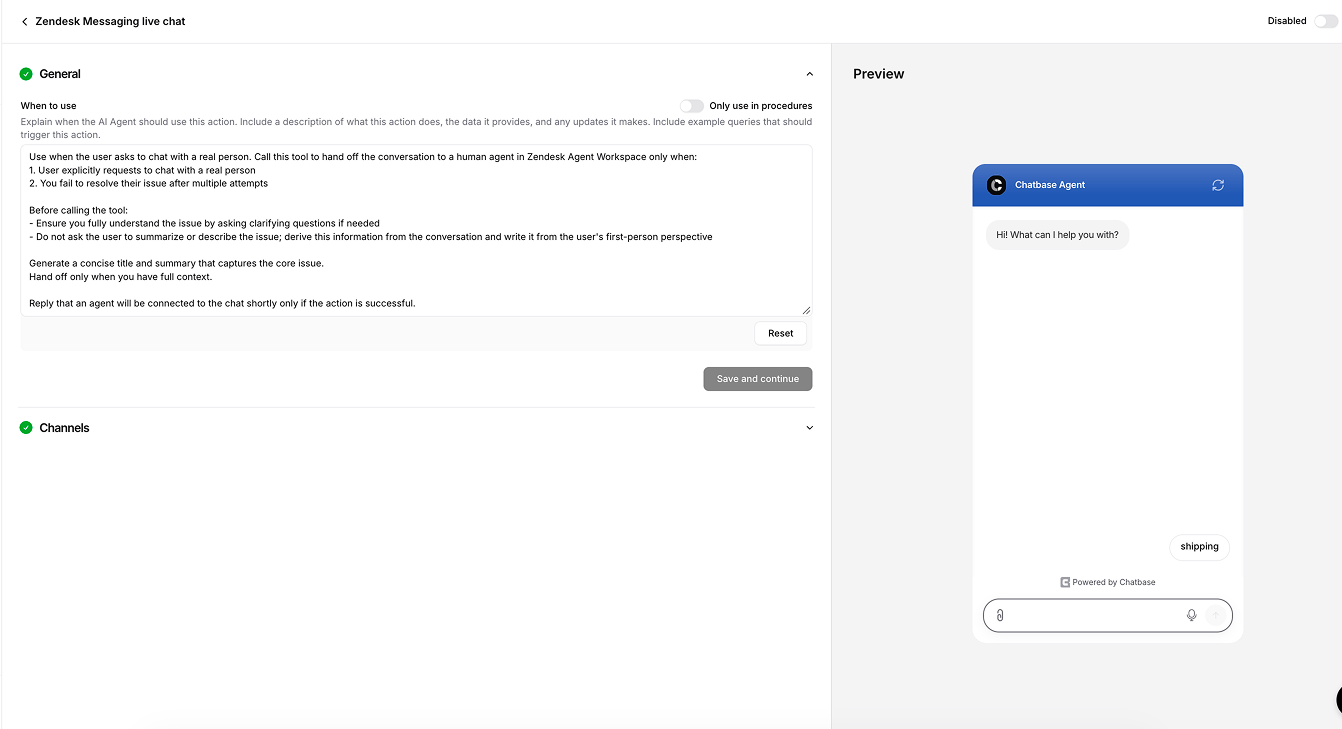
 Edit **When to use** to describe when the AI agent should hand off. By default, it hands off when a customer asks for a person or the AI agent can't solve the issue.
Click **Save and continue**, then turn on the toggle at the top right.
Edit **When to use** to describe when the AI agent should hand off. By default, it hands off when a customer asks for a person or the AI agent can't solve the issue.
Click **Save and continue**, then turn on the toggle at the top right.
 What happens during a handoff:
1. If the customer isn't signed in, the AI agent asks for their email.
2. The chat moves to Zendesk Agent Workspace with a title and short summary for your team.
3. The AI agent stops replying while your team has the chat.
4. When your team ends the messaging session, the customer's next message goes to the AI agent again.
## How it works
* **Greeting.** When a customer opens a new chat in your Web Widget or app, the AI agent sends its initial messages.
* **Suggested messages.** These show as reply buttons the customer can tap.
* **Name and picture.** The AI agent uses its display name and profile picture.
* **Inactive chats.** A conversation ends after 24 hours without a message.
* **Conversations.** Chats appear in **Activity > Conversations** with the source **Zendesk Messaging**.
Attachments are supported, so your AI agent can read files customers send. See [Attachments](/docs/user-guides/chatbot/channels#attachments).
## Limitations
* Messages your team sends after a handoff don't appear in Chatbase.
* The AI agent replies with text only. It can't send files or images.
## Disconnect
Remove Chatbase from your channels in Zendesk first, or customers on those channels won't get a reply. In Zendesk Admin Center, go to **AI > AI agents > Manage marketplace bots**, click **Chatbase**, clear its channels, and click **Save**.
Then in Chatbase, go to **Integrations**, open the menu on the **Zendesk Messaging** card, and click **Disconnect**. This removes the connection and the **Live chat** action from this AI agent.
## Next steps
Let your AI agent reply to Zendesk tickets, or open a ticket when a chat needs a person.
This documentation is built and hosted on [Mintlify](https://mintlify.com), a developer documentation platform.
What happens during a handoff:
1. If the customer isn't signed in, the AI agent asks for their email.
2. The chat moves to Zendesk Agent Workspace with a title and short summary for your team.
3. The AI agent stops replying while your team has the chat.
4. When your team ends the messaging session, the customer's next message goes to the AI agent again.
## How it works
* **Greeting.** When a customer opens a new chat in your Web Widget or app, the AI agent sends its initial messages.
* **Suggested messages.** These show as reply buttons the customer can tap.
* **Name and picture.** The AI agent uses its display name and profile picture.
* **Inactive chats.** A conversation ends after 24 hours without a message.
* **Conversations.** Chats appear in **Activity > Conversations** with the source **Zendesk Messaging**.
Attachments are supported, so your AI agent can read files customers send. See [Attachments](/docs/user-guides/chatbot/channels#attachments).
## Limitations
* Messages your team sends after a handoff don't appear in Chatbase.
* The AI agent replies with text only. It can't send files or images.
## Disconnect
Remove Chatbase from your channels in Zendesk first, or customers on those channels won't get a reply. In Zendesk Admin Center, go to **AI > AI agents > Manage marketplace bots**, click **Chatbase**, clear its channels, and click **Save**.
Then in Chatbase, go to **Integrations**, open the menu on the **Zendesk Messaging** card, and click **Disconnect**. This removes the connection and the **Live chat** action from this AI agent.
## Next steps
Let your AI agent reply to Zendesk tickets, or open a ticket when a chat needs a person.
This documentation is built and hosted on [Mintlify](https://mintlify.com), a developer documentation platform.